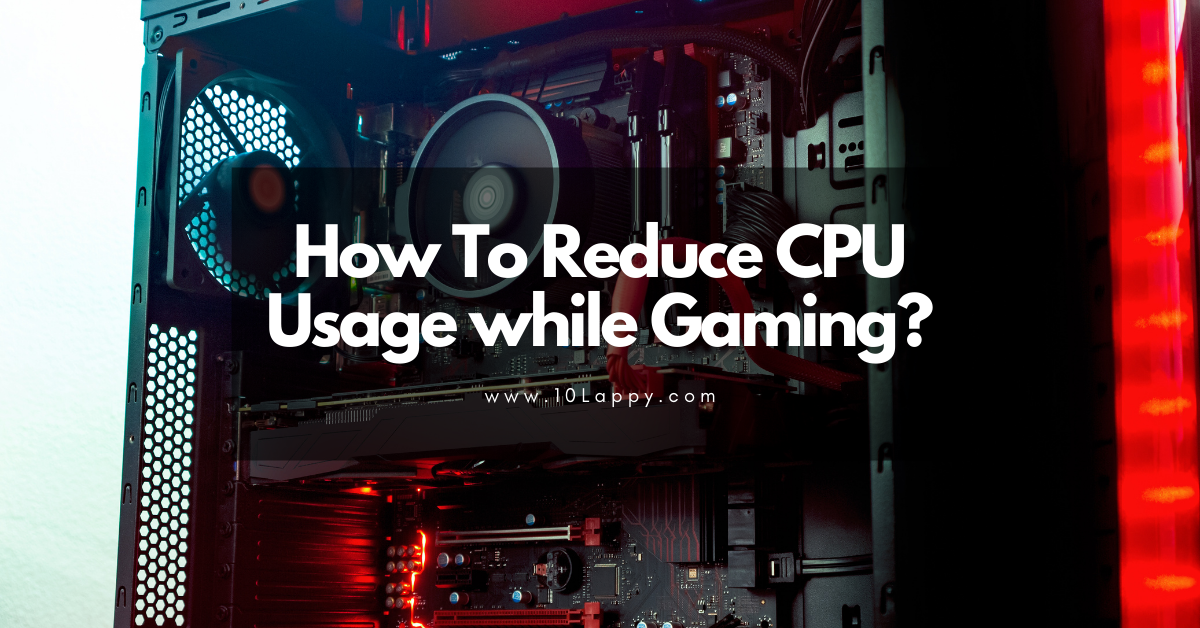
How to Reduce CPU Usage While Gaming
High CPU usage while gaming is annoying because it rarely announces itself clearly. One minute your game runs fine, the next it stutters, freezes for a second, or drops frames at the worst possible moment.
If the goal is higher frame rates rather than just lower CPU load, our guide to how to increase FPS on a gaming laptop covers the 12 settings that matter most.
The CPU is the part of your laptop that runs the game logic, physics, artificial intelligence for non player characters, audio processing, and all the background work Windows needs at the same time.
When too many of those jobs compete for the same processor, the game is the one that suffers, and you feel it as lag, hitching, or long loading pauses.
Before you change anything, it helps to understand one simple idea. High CPU usage is not always a problem by itself. A demanding game is supposed to use your processor.
The real problem is when something other than the game is eating CPU time, when your CPU is held back by heat or a power saving setting, or when your hardware is simply too weak for the settings you chose. Each of those causes has a different fix, and guessing usually wastes time.
This guide works through them in order, from the quick checks that take two minutes to the deeper fixes you only need if the quick ones do not help.
Quick Answer: To reduce CPU usage while gaming, open Task Manager and close the background apps using the most CPU, turn on Game Mode in Settings, set your power mode to Best performance while plugged in, set the game to High performance graphics, turn off background recording and unneeded overlays, and lower CPU heavy in game settings such as draw distance, shadows, and crowd density. If usage stays high after that, check for overheating, update your drivers, and check whether RAM or storage is the real bottleneck.
Why Is CPU Usage So High While Gaming?
A game asks a lot of a laptop processor. It has to track every object in the scene, calculate physics, run the logic for enemies and teammates, process sound, handle your inputs, and talk to the graphics card dozens of times per second.
On a laptop without a strong dedicated graphics card, the CPU carries even more of that load, because there is no separate graphics processor to take the rendering work away.
Background software adds to that load. A web browser with many tabs open, a chat app, a screen recorder, a cloud sync tool, an antivirus scan, and a Windows update can all run at the same time as your game. Individually, each one may use only a small amount of CPU.
Together, they can steal enough processing time to make a game stutter, especially on a laptop with a modest processor or only a few cores.
Heat is another common cause that looks like high CPU usage but is really the opposite problem. When a laptop gets too hot, the processor slows itself down to protect itself. This is called thermal throttling.
The game then needs more time to do the same work, frames take longer, and Task Manager may still show high usage because the processor is struggling. In that case the fix is cooling, not closing more apps. Our guide to stopping a laptop from overheating covers the safe cleaning and airflow steps in detail.
Settings matter too. A power plan set to save battery will hold your processor at lower speeds. A game running on integrated graphics instead of the dedicated graphics card will lean on the CPU. Very high in game settings for shadows, draw distance, and physics will push the CPU harder than the graphics card.
All three are easy to fix once you know where to look, and none of them requires buying anything.
Finally, some games are simply CPU heavy by design. Strategy games with hundreds of units, open world games with large cities full of characters, and simulation games all lean on the processor more than a simple racing game does.
If your laptop meets only the minimum requirements for such a game, high CPU usage is expected, and the realistic goal is smoother play at lower settings, not low usage numbers for their own sake.

Step 1: Find What Is Actually Using Your CPU
Do not start by closing apps at random. Spend two minutes finding the actual culprit, because the fix for a browser eating CPU is different from the fix for a stuck update or a recording tool running in the background.
First, launch your game and play for a few minutes until the problem appears. Then press Ctrl plus Shift plus Esc to open Task Manager. If it opens in a compact view, click More details. Click the Processes tab, then click the CPU column header so the highest CPU user sits at the top.
The game itself should be near the top, and that is normal. Look at everything above and around it. A browser, a launcher, a sync tool, an updater, or a recording app sitting at a high percentage while you play is a suspect.
Next, note whether the high usage is constant or spiky. Constant high usage from one background app points to that app. Usage that jumps up and down every few seconds can point to a scan, an update, or a sync job that will finish on its own.
Usage that climbs slowly over a long session and never comes back down can point to heat building up or a memory leak in one program, which a restart will often clear.
Also check the Performance tab. Click CPU and look at the utilisation graph and the speed shown underneath it. If the speed is far below your processor’s normal boost speed while the game is running and the laptop feels hot, throttling is likely.
If utilisation sits near 100 percent but the speed looks healthy, you are more likely facing a genuine overload, and the steps on settings and background apps will help most.
Write down the names of the top three non game processes before you close anything. That list is your shortlist for the rest of this guide.
If the same name keeps appearing every time you play, that app deserves a permanent fix, such as turning off its startup entry or its background recording, rather than closing it again every session.
One warning is worth stating plainly. Do not end processes you do not recognise in Task Manager, and never end Windows system processes to free CPU. Ending the wrong process can crash your game, break your audio, or force a restart.
Close normal apps through their own windows where possible, and use Task Manager’s End task only for a named app you recognise and no longer need open.
Step 2: Close Background Apps and Overlays Before You Play
This is the fastest win for most gaming laptops, and it costs nothing. Every app running while you play competes for the same processor, the same RAM, and sometimes the same disk.
Start with the obvious ones. Close browser tabs and windows you do not need, especially tabs playing video or running heavy web apps. Close chat apps, music players, screen recorders, and cloud storage sync tools if you do not need them during the session.
A launcher for another game store can also sit in the background using CPU, so close launchers for games you are not playing.
Then look at overlays. The Xbox Game Bar, Discord overlay, Steam overlay, and graphics card overlays are convenient, but each one adds work while the game runs. Background recording is the heaviest of these, because it captures your gameplay continuously even when you never save a clip.
In Windows, go to Settings, then Gaming, then Captures, and turn off background recording if you do not use it. You can still record manually when you want a clip, without paying the CPU cost for every minute you play.
If you use Discord while gaming, consider whether you need the in game overlay itself. Voice chat uses far less CPU than the overlay and video features, so keep voice and turn off the overlay if your game stutters. The same logic applies to streaming tools.
Streaming and recording while playing is genuinely CPU heavy, and if your laptop struggles, streaming at a lower resolution or using your graphics card’s encoder instead of software encoding will help more than any other single tweak.
Make this a habit rather than a one off cleanup. A simple pre game routine, close the browser, close unneeded launchers, check Task Manager once, then launch the game, takes less than a minute and prevents most background CPU surprises.
If you play on a gaming laptop regularly, the cooling advice in our guide to keeping a gaming laptop cool pairs well with this step, because a cool laptop holds its speed for longer sessions.
Step 3: Turn On Game Mode and Set the Game to High Performance Graphics
Windows 11 has two built in settings that directly help gaming, and both are worth checking even if you think they are already on.
First, Game Mode. Go to Settings, then Gaming, then Game Mode, and make sure the switch is on. Game Mode is on by default on Windows 11. When it detects a game, it gives the game priority and holds back Windows Update driver installs and restart prompts while you play.
It will not magically fix a weak processor, and it does not overclock anything, but it stops Windows from interrupting your session with background work at the worst moment.
If a particular game behaves worse with Game Mode on, turn it off for a test session and compare, because the effect depends on the game and the hardware.
Second, the graphics preference for the game. On a laptop with both integrated graphics and a dedicated graphics card, a game can sometimes run on the weaker integrated graphics by mistake. That forces the CPU to carry rendering work it should not have to carry. Go to Settings, then System, then Display, then Graphics.
Find your game under Custom options for apps, or use Browse to add it if it is not listed. Select it, choose Options, then choose High performance, and save.
On a laptop with only one GPU this option changes little, but on a dual GPU laptop it is one of the most important checks in this whole guide.
While you are on the Graphics page, look at the default graphics settings. If you play in windowed or borderless windowed mode, turning on Optimizations for windowed games can help DirectX 10 and 11 games present frames more smoothly. This is a Windows 11 setting, so it will not appear on older Windows versions.
It is not a fix for high CPU usage on its own, but it removes one source of stutter in windowed games.
Restart the game after changing these settings so the new graphics preference takes effect. Changing the setting while the game is already running will not switch the GPU underneath it.
Step 4: Use the Right Power Mode While Plugged In
Power settings are a classic cause of high CPU usage complaints, because a laptop trying to save battery will deliberately hold the processor back. The game then takes longer to do its work, and the session feels slow even though Task Manager shows the CPU working hard.
On Windows 11, go to Settings, then System, then Power and battery, and set Power mode to Best performance before a gaming session. Do this while the laptop is plugged into its charger.
Best performance on battery will drain the battery quickly and can still throttle sooner, because the laptop cannot draw as much power from the battery as from the wall. For serious gaming, plugged in is the right expectation, not a workaround.
If you use the older Control Panel Power Options, the equivalent choices are Balanced and High Performance. Balanced is the sensible default for everyday use, because it scales processor speed to the task.
High Performance keeps the processor ready at higher speeds and reduces power saving delays, at the cost of more heat and fan noise. On a modern Windows 11 laptop you may only see Balanced, because newer laptops manage power through the Power mode setting instead of the old plans.
That is normal, and the Power mode setting is the one to change.
There is also a hidden Ultimate Performance plan on some Windows Pro systems, added with a command line tool. For most gaming laptops it is not worth chasing. It mainly reduces small power saving delays, it does not raise your processor’s maximum speed, and it will not stop thermal throttling.
Best performance while plugged in gives you almost all of the benefit without extra complexity.
After a session, switch back to Balanced or Best power efficiency if you care about battery life or fan noise. Leaving Best performance on all day on a laptop means more heat, more fan noise, and faster battery wear for no benefit while you browse or write documents.
Step 5: Stop Unneeded Apps From Starting With Windows
Closing apps before each session helps, but if the same apps reopen every time you sign in, you will repeat the same cleanup forever. Fixing startup apps is the permanent version of Step 2.
Go to Settings, then Apps, then Startup. You will see a list of apps that launch when you sign in, each with a toggle. Turn off anything you do not need the moment you sign in, such as chat apps, launchers, sync tools, and updaters you can open manually.
Turning an app off here does not uninstall it. You can still open it from the Start menu whenever you want it.
For more detail, open Task Manager with Ctrl plus Shift plus Esc, then open the Startup apps page. This view shows a Startup impact column that rates each app as Low, Medium, or High based on how much CPU time and disk activity it uses during sign in.
Start with the High impact apps you do not need at sign in, select one, and choose Disable. Then restart the laptop once so you can feel the difference on the next sign in.
Keep security software and driver related tools enabled. Disabling your antivirus or your graphics control panel at startup can cause real problems, and those tools usually cost little CPU once sign in finishes. The goal is to remove the apps you forgot about, not to strip Windows down to nothing.
If an app keeps re enabling itself after you turn it off, check inside the app itself for a setting like Launch at startup or Open when I sign in, and turn it off there. Some apps also use Task Scheduler tasks that run at log on.
If you are comfortable with Task Scheduler, you can review its Library for log on tasks from that app, but do not disable tasks you do not recognise. When in doubt, leave the task alone and simply close the app before gaming.
Step 6: Lower the CPU Heavy In Game Settings First
When the CPU is the bottleneck, lowering graphics settings at random does not always help, because many graphics settings load the graphics card, not the processor. The settings that hit the CPU hardest are the ones that increase the number of things the processor must track.
Start with draw distance and view distance. A longer draw distance means more objects, characters, and terrain for the CPU to manage. Reducing it is often the single biggest CPU saving in open world games. Next, look at shadows.
High quality shadows cost both CPU and GPU time, so dropping shadow quality one or two steps helps more than dropping texture quality, which mostly affects video memory.
Then check crowd density, physics detail, and population settings where the game offers them. Games that simulate large crowds, traffic, or destructible objects spend a lot of CPU time on those simulations. Turning those settings down reduces the simulation load directly.
Anti aliasing and resolution, by contrast, mostly load the GPU, so lowering them may raise frame rates on a GPU limited system without doing much for CPU usage. That distinction matters, because it stops you from making the game look worse for no CPU benefit.
Frame rate caps deserve a mention too. If your laptop can only just hold 60 frames per second, letting the game run uncapped forces the CPU to prepare as many frames as possible, which keeps usage at maximum and generates extra heat.
Capping the frame rate to your monitor’s refresh rate, or to a stable value your laptop can actually hold, gives the CPU breathing room between frames and often produces smoother play than a higher but unstable frame rate.
Test one change at a time where you can. Change draw distance, play the same section of the game, and see whether stutter improves. Then change shadows, and test again.
Changing five settings at once makes it impossible to know which one helped, and you may end up with a worse looking game than you needed.
Step 7: Update Drivers and Windows, Then Rule Out a Stuck Update
Outdated or broken drivers are a less common cause of high CPU usage than background apps, but they are worth ruling out because the fix is straightforward and the symptoms can be confusing.
A graphics driver problem can cause stutter that looks like CPU overload, and a stuck Windows update can keep a background process busy for hours.
Update your graphics driver from the graphics card maker’s own software or website, not from a random driver updater tool. For a laptop, check the laptop maker’s support page first if it provides its own graphics drivers, because some laptops need the maker’s version for switching between integrated and dedicated graphics to work properly.
Install the driver, restart, and test the same game section again.
Then check Windows Update. Go to Settings, then Windows Update, and install any pending updates, then restart if asked. A pending update that keeps retrying in the background can use CPU and disk at the same time as your game.
Game Mode holds back driver installs during play, but it does not finish an update that is already stuck, so clearing the backlog before gaming matters.
Also check your launcher and game for updates. A game client verifying files or downloading a patch in the background while you play another game is an easy mistake to make, especially with automatic updates enabled. Pause downloads in other launchers before a session, and let one update finish before you start playing.
Avoid driver updater utilities and so called game booster apps that promise to free CPU by closing services. They often close things Windows needs, change settings you cannot easily undo, and install extra software of their own.
The built in Windows settings in this guide do the same job safely, and Task Manager shows you exactly what is running.
Step 8: Check Heat, Fans, and Throttling Before You Blame the Processor
If you have closed background apps, fixed power and graphics settings, and lowered CPU heavy settings, but the game still stutters after ten or twenty minutes, heat is the next suspect. This pattern, fine at first and worse later, is the classic sign of thermal throttling.
You do not need special software to start checking. Play until the problem appears, then feel the airflow from the vents and listen to the fans. Weak airflow, very hot air, or fans that stay loud from the start can all point to blocked vents.
Check that the laptop sits on a hard flat surface with its vents clear, not on a bed, blanket, or your lap, where vents get blocked. A cooling pad can help on a gaming laptop, but it cannot fix vents blocked by dust.
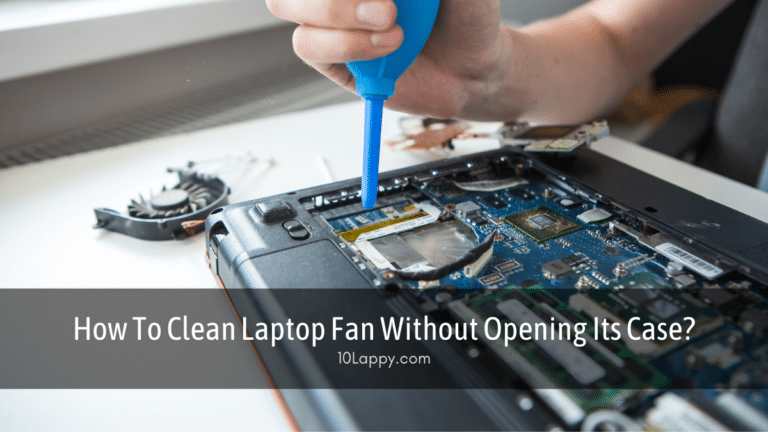
For a safe clean without opening the case, use short bursts of compressed air through the vents while the laptop is off and cool, holding the can upright as its label directs.
Our guide to cleaning a laptop fan without opening the case gives the full safe method, including what never to do with a vacuum cleaner or a high pressure air source.
If the laptop is still under warranty, check the maker’s terms before opening it yourself, because opening the case can affect warranty on some models.
You can also watch temperatures with a monitoring tool such as the Xbox Game Bar Performance widget, opened with Win plus G, which shows CPU, GPU, RAM, and frame rate while you play. You do not need to memorise exact temperature limits for every processor.
The useful signal is the pattern: temperatures climbing steadily while performance falls at the same time points to throttling, while steady temperatures with high CPU usage points back to overload or settings.
If cleaning and airflow do not help and the laptop is old, dried thermal paste or a failing fan may be the cause. That is a repair job, not a settings fix.
A local repair shop can check fan health and repaste a laptop, and that is cheaper than replacing a laptop that is otherwise fine. Do not keep pushing a laptop that shuts itself down from heat. Repeated overheating shutdowns are a warning to get it checked, not a challenge to work around.
Step 9: Check RAM and Storage, Because They Can Look Like CPU Problems
A laptop short on RAM will constantly move data between RAM and the storage drive, a process called paging. That extra work shows up as high disk usage and stutter, and the CPU spends time managing it, so the problem looks like CPU usage even though RAM is the real shortage.
The same happens with a nearly full or very slow drive, which makes loading new areas in a game stutter.
While the game runs, check Task Manager’s Performance tab for Memory. If memory usage sits near 100 percent while you play, closing background apps will help, but the long term fix is more RAM, if your laptop allows an upgrade.
Our guide to how much RAM you need for gaming explains the practical difference between common sizes, and checking your laptop maker’s specifications will tell you whether your model can be upgraded at all. Many thin laptops have soldered RAM that cannot be upgraded, and knowing that before you buy parts saves money.
Also check the disk. If Task Manager shows the disk at 100 percent while the game loads or stutters, and you still use a hard drive rather than a solid state drive, the drive is likely part of the problem.
Moving the game to a solid state drive, or upgrading to one, usually improves loading and reduces stutter more than any CPU setting. Keep at least some free space on the drive too, because a completely full drive slows Windows itself.
Finally, check whether the game is installed on the fastest drive you have. A game on an old external hard drive will load slowly no matter how good your CPU is.
This step is about removing a bottleneck that masquerades as CPU usage, and it is worth doing before you conclude that your processor is simply too weak.
| Symptom | Likely cause | First fix to try | Check next if it does not help |
|---|---|---|---|
| One background app tops Task Manager CPU | Background overload | Close it and disable its startup entry | Its own in app startup setting |
| Game stutters only after 20 minutes | Heat and throttling | Clear vents and clean fans safely | Fan health and thermal paste |
| High usage with low frame rate on battery | Power saving mode | Plug in and set Best performance | Graphics preference for the game |
| Stutter in large open areas | CPU heavy settings too high | Lower draw distance and shadows | Crowd density and physics settings |
| Memory near 100 percent while playing | Too little RAM | Close background apps first | RAM upgrade if the laptop allows it |
| Disk at 100 percent during loading | Slow or full drive | Free space and move the game to SSD | Drive health check |
Step 10: Isolate a Stubborn Culprit With a Clean Boot
Most readers will never need this step. Keep it for the case where high CPU usage appears in every game, Task Manager shows no obvious app, and the earlier steps changed nothing. That pattern suggests a third party service or startup item you have not spotted yet.
A clean boot starts Windows with only Microsoft services and no startup apps, so you can tell whether third party software is the cause at all. Open System Configuration by searching for msconfig, go to the Services tab, tick Hide all Microsoft services, then choose Disable all and Apply.
Then go to the Startup tab, open Task Manager, and disable every startup app listed there, writing down what you turned off. Restart the laptop. If games now run smoothly, a third party item was the culprit, and you can re enable items a few at a time until the problem returns, which identifies it.
Do not use a clean boot as your everyday setup. It is a diagnostic tool, not a performance mode. Some features will not work normally while it is active, and security software may be among the items disabled.
Once you have identified the culprit, undo the clean boot by re enabling the services and startup apps you need, and fix or remove only the one item that caused the problem.
If a clean boot does not help either, the remaining causes are hardware limits, heat, or the game itself. At that point the honest options are lower settings, a repair check for heat or fan problems, or a hardware upgrade.
Before you choose that upgrade, check whether you can upgrade your laptop processor from i5 to i7, since many laptop processors are soldered and cannot be swapped. Reinstalling Windows is sometimes suggested online as a cure all, but it is a last resort.
It takes hours, risks your files if you skip a backup, and will not fix a processor that is simply too weak for the game at your chosen settings. Back up everything first if you ever go that route.
If you are weighing an upgrade, our guide to converting a normal laptop into a gaming laptop is a useful reality check. It covers the free settings first, then RAM and SSD upgrades, then the limits of what a normal laptop can become.
That order, free fixes, then cheap upgrades, then a new machine, is the right way to spend money on this problem. If replacement wins that comparison, the best gaming laptops under 500 give you a realistic starting point for a budget upgrade.
Frequently Asked Questions
Why is my CPU at 100 percent while gaming?
A CPU at 100 percent while gaming means the processor is fully loaded, but it does not by itself tell you whether something is wrong. Check Task Manager to see whether the game itself or a background app is using the CPU. If the game uses most of it and play is smooth, that is normal for a demanding game. If a background app uses a large share, or play stutters, close background apps, turn on Game Mode, and lower CPU heavy settings such as draw distance and shadows.
Does Game Mode really reduce CPU usage?
Game Mode does not directly lower the CPU usage number, and it does not overclock your processor. It gives the game priority and holds back Windows Update driver installs and restart prompts while you play. That reduces interruptions and background competition, which often makes play smoother even if the usage percentage looks similar. Leave it on unless a specific game runs worse with it, in which case test that game with it off.
Should I use High Performance or Ultimate Performance power plan?
For gaming on a laptop, Best performance power mode while plugged in is the right choice for most people. The older High Performance plan does a similar job through Control Panel Power Options. Ultimate Performance is a workstation plan that mainly reduces small power saving delays, does not raise maximum processor speed, and does not stop thermal throttling, so it is not worth chasing for gaming alone.
Will closing background apps actually increase FPS?
Closing background apps helps most when a background app is genuinely using significant CPU, RAM, or disk while you play. In that case you may see smoother frames and fewer stutters. If no background app is using much CPU, closing apps will change little, because the game itself is the load. Task Manager tells you which case you are in, so check it before expecting a frame rate gain.
Is high CPU usage bad for my laptop?
High CPU usage during gaming is normal and will not damage a healthy laptop by itself, because processors are designed to slow down or shut down if they overheat. The risk comes from sustained overheating, blocked vents, or failing fans, not from the usage number alone. Keep vents clear, clean dust safely, and get the laptop checked if it shuts down from heat or the fans stop working properly.
The Verdict
Reducing CPU usage while gaming is mostly about removing competition for your processor, not about finding a secret setting. Start with Task Manager, close what you do not need, turn on Game Mode, set Best performance while plugged in, and make sure the game uses High performance graphics.
Then lower the settings that actually load the CPU, such as draw distance, shadows, and crowd density, and check heat and RAM if the problem survives those fixes. Work through the steps in order, test after each change, and you will find the real cause faster than by changing everything at once.
If the laptop still struggles after all of that, the honest answer is a cooling check, a RAM or SSD upgrade where possible, or lower settings, rather than another background tweak.