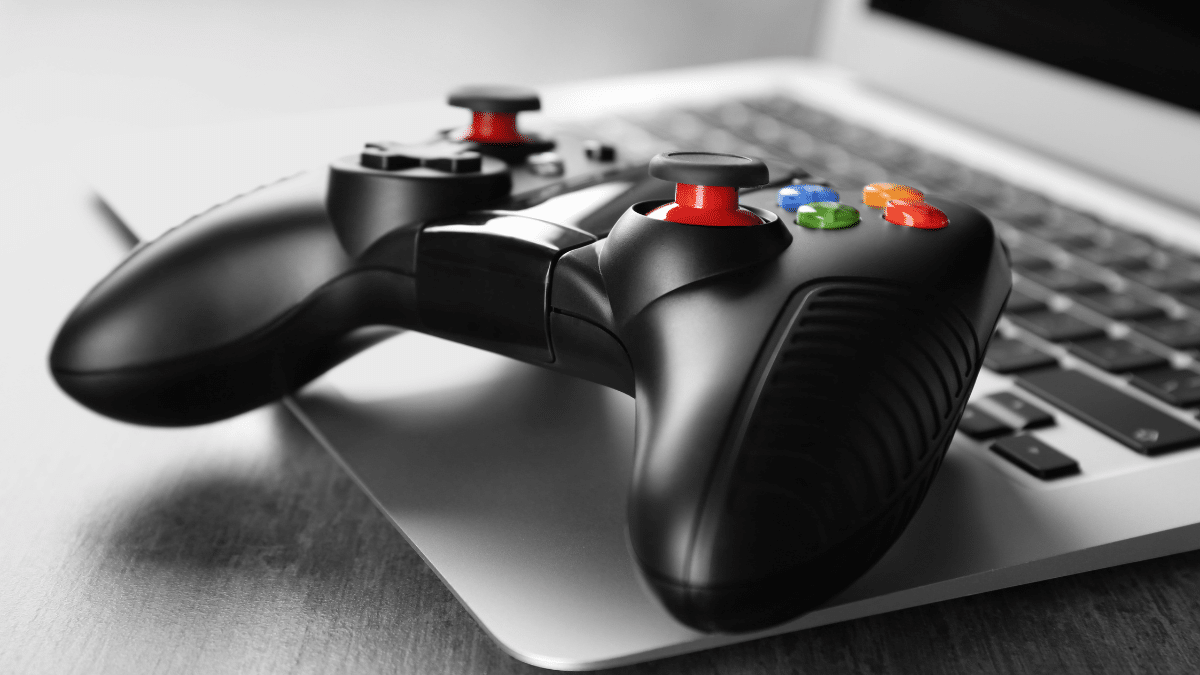
How to Convert a Normal Laptop Into a Gaming Laptop
A normal laptop can play games far better than it does today, but it cannot magically become a purpose built gaming machine.
The honest goal is narrower and still worth doing: remove the bottlenecks that waste the hardware you already own, upgrade the two parts most laptops allow you to change, and decide whether an external graphics card or a new laptop is the smarter spend. Most of the gains in this guide cost nothing.
The paid upgrades are listed in order of value, so you can stop at the point where the extra money stops making sense.
The first thing to accept is the limit that shapes everything else. On most modern laptops the processor and the graphics chip are soldered to the motherboard, which means they cannot be swapped the way desktop parts can.
That is why the original advice to simply upgrade the graphics card does not apply to most laptops. What you can usually change is memory and storage, and what you can always change is software, settings, cooling and, on some models, the graphics card sitting outside the laptop in an enclosure.
Work through those in that order and you will know exactly how far your machine can go.
Quick Answer: To turn a normal laptop into a gaming laptop, plug it in and set Best performance power mode, turn on Game Mode, update your graphics driver from your laptop maker or NVIDIA, AMD or Intel, close heavy background apps, lower in game resolution and shadows, and use DLSS, FSR or XeSS upscaling where the game offers it. Then upgrade to dual channel RAM and an SSD if you do not have them, clean the vents, and only consider an external graphics card if your laptop has a Thunderbolt port. If the processor or graphics chip itself is too weak for the games you want, a dedicated gaming laptop is the better buy.
| Upgrade path | Typical cost | Difficulty | Best for |
|---|---|---|---|
| Windows settings and driver updates | Free | Easy, under an hour | Every laptop, do this first |
| RAM and SSD upgrade | Low to moderate | Moderate, check the manual first | Laptops with 8 GB RAM or a hard drive |
| Cooling fixes and a cooling pad | Low | Easy | Laptops that slow down when hot |
| External graphics card enclosure | High | Moderate, Thunderbolt only | Thunderbolt laptops kept at a desk |
Can You Really Turn a Normal Laptop Into a Gaming Laptop?
Yes, up to a point, and that point is set by your processor and graphics hardware. A laptop with a recent processor, 16 GB of RAM, an SSD and even modest dedicated graphics can run a large library of games well once its settings are fixed.
A ten year old laptop with a weak integrated graphics chip will still struggle with demanding new releases no matter how many tweaks you apply, because no setting creates graphics power that is not there.
Think of the work in three layers. The free layer fixes wasted performance: background apps eating memory, the wrong graphics chip running the game, power saving throttling the processor, and old drivers. The upgrade layer fixes the two parts laptops usually let you change: RAM and storage.
The external layer adds desktop graphics through a Thunderbolt enclosure, but only on laptops that support it. If you work through the layers in order, you will either reach playable frame rates or you will have clear proof that a new machine is the right answer, rather than guessing.
It also helps to know what a gaming laptop actually adds over a normal one. Dedicated graphics, faster cooling, a higher refresh rate screen and more power headroom are the real differences, not the backlit keyboard or the styling.
Our comparison of a gaming laptop vs regular laptop explains each difference in detail, and it is a useful read before you spend money trying to close a gap that only new hardware can close.

Step 1: Check What Your Laptop Can Actually Run
Before changing anything, find out what you own and what your games need. Guessing leads to buying RAM for a laptop that is actually held back by its graphics chip, or lowering settings in a game that would run fine once the right graphics chip is selected.
Open Settings, then System, then About, and note the processor, installed RAM and Windows edition.
Then open Task Manager with Ctrl plus Shift plus Esc, go to the Performance tab, and check whether you have a dedicated GPU listed alongside the integrated graphics, how much RAM is in use at idle, and whether your main drive is an SSD or a hard drive.
Press Windows key plus R, type dxdiag and press Enter for a fuller report on graphics and driver versions if a game asks for them.
Next, check the system requirements on the official store page or the publisher site for each game you want to play, and compare the minimum and recommended figures with your hardware. Pay attention to three numbers in particular: the graphics card, the RAM figure and the storage type.
A game that lists an SSD as recommended will stutter on a hard drive even if the processor looks fast enough. A game that needs 16 GB of RAM will stutter on 8 GB no matter how low you set the graphics, because the system will keep swapping data to the drive.
Run one game for ten minutes and watch Task Manager or the in game frame rate display. If RAM sits above 90 percent, memory is your bottleneck. If the graphics chip sits at 100 percent while the processor is relaxed, graphics is your bottleneck.
If frame rates start fine and then fall after a few minutes while the laptop gets hot, heat is your bottleneck. Each bottleneck has a different fix, and the rest of this guide follows that order.
Step 2: Make Windows Work for Games, Not Against Them
Start with the free settings, because they fix the most common reason a normal laptop plays badly: it is running in a mode designed to save battery and stay quiet.
Keep the laptop plugged in while you play. On battery power, Windows and the laptop firmware limit performance to protect battery life, and no in game setting can fully undo that. Then open Settings, go to System, then Power and battery, and set Power mode to Best performance while gaming.
Switch back to Balanced afterwards if fan noise or heat bothers you during normal work, since Best performance also runs warmer.
Turn on Game Mode in Settings, then Gaming, then Game Mode. Microsoft describes Game Mode as a setting that stops Windows Update from installing drivers and sending restart notifications while you play, and that gives the game priority over background work.
It will not turn a weak laptop into a strong one, and on a powerful machine the difference may be small, but on a laptop with background apps competing for resources it helps frame rates stay steadier.
Leave it on unless one specific game runs worse with it, in which case turn it off and test that game again.
Next, make sure the game uses the right graphics chip. On laptops with two graphics processors, Windows sometimes runs a game on the power saving integrated chip. Go to Settings, then System, then Display, then Graphics, find the game under custom options for apps or add its executable file, open Options and choose High performance.
This single setting fixes a surprising number of cases where a laptop with decent dedicated graphics still plays badly. On Windows 11 you can also turn on Optimizations for windowed games on the same Graphics page, which Microsoft documents for DirectX 10 and DirectX 11 games played in windowed or borderless windowed mode.
Restart the game after changing either setting.
Close what you do not need before you play. A browser with many tabs, a video call, a cloud sync tool and a game launcher can easily eat several gigabytes of RAM and a noticeable share of processor time.
Close the browser, pause cloud syncing during the session, and check Task Manager Startup apps to stop heavy programs launching with Windows. Do not install generic booster utilities or edit the registry to chase performance; those tools promise more than Windows own settings deliver, and they can break updates or security features.
If usage is still high in Task Manager while a game is running, follow these steps to reduce CPU usage while gaming before you blame the hardware.
Step 3: Update Your Graphics Driver the Safe Way
An old or wrong graphics driver is one of the few software problems that can genuinely cost you a large amount of performance or cause crashes. The safe rule for laptops is simple: check your laptop maker first, then the chip maker.
Laptop makers such as Dell, HP and Lenovo publish drivers tested for your exact model, including power and cooling behaviour that a generic driver may not match. NVIDIA itself notes that the original equipment manufacturer provides certified drivers for a specific notebook, and recommends checking with the notebook maker for recommended updates.
So start at your laptop maker support page, enter your model or serial number, and install the graphics driver it offers.
If your laptop maker driver is far out of date and a game needs a newer one, you can use the chip maker driver instead.
NVIDIA owners can use the NVIDIA app, which replaced GeForce Experience, to check for Game Ready drivers, which NVIDIA tunes for the latest releases and for DLSS and ray tracing support.
AMD owners can use AMD Software: Adrenalin Edition, and Intel owners can use the Intel Driver and Support Assistant or Intel Arc Control, depending on the graphics hardware. In each case choose a clean installation if you are troubleshooting crashes or moving from a much older driver, and restart after installing.
Update Windows itself as well, but do it before a gaming session, not during one. A pending feature update downloading in the background will compete for drive and processor time and can ruin an otherwise fair test.
After updates, play the same game at the same settings for ten minutes and compare the result with your earlier run. Change one thing at a time so you know which change actually helped.
Step 4: Upgrade RAM and Storage Where Your Laptop Allows It
RAM and storage are the two upgrades that most often turn a struggling normal laptop into a capable gaming laptop, and they are also the upgrades most likely to be possible. But possible depends on the model, so check before buying anything.
First, find your laptop service manual or maintenance manual on the maker support site and check three facts: whether the RAM is soldered or socketed, how many RAM slots exist, and the maximum supported memory. Many thin laptops solder all RAM, which means no upgrade is possible.
Many mainstream laptops have one or two SODIMM slots, and some ship with one slot filled and one empty.
If your laptop has 8 GB in a single stick, adding a second matching stick to reach 16 GB in dual channel mode is often the single best value upgrade for gaming, because dual channel memory feeds integrated graphics much faster than a single stick.
Our guide to how much RAM you need for gaming explains why 16 GB is the sensible target for most players and when 32 GB earns its price.
Storage matters just as much. If your laptop still boots from a hard drive, moving Windows and your games to an SSD is the upgrade you will feel everywhere: faster boot, faster level loads and fewer stutters when a game streams data.
Check whether your laptop has a free M.2 slot or a 2.5 inch bay, and which drive size and interface the manual allows. Clone the old drive or reinstall Windows fresh, then keep at least 15 to 20 percent of the SSD free, because a nearly full SSD slows down.
When you plan how many games to keep installed at once, check how much storage you need on a laptop so you do not buy a drive that fills up after two large titles.
Do not plan a processor or internal graphics upgrade for most laptops. The processor in most modern laptops is soldered, and even on the rare models with a socketed processor, BIOS support, cooling capacity and power limits usually block a meaningful swap.
Our guide on whether you can upgrade a laptop processor from i5 to i7 walks through the socket, BIOS, power and cooling checks that decide the rare cases where it works. If those checks fail, spend the money on RAM, an SSD or a future laptop instead of a processor you cannot install.
Step 5: Fix Heat Before You Buy Anything Else
A laptop that starts a game smoothly and then slows down is usually protecting itself from heat. Processors and graphics chips reduce their speed when they get too hot, which shows up as frame rates that fall after a few minutes, fans running at full speed and a hot keyboard deck.
No settings change fixes this on its own, because the hardware is doing exactly what it was designed to do.
Start with airflow. Use the laptop on a hard, flat surface with the vents clear, never on a bed, blanket or sofa cushion that blocks the intake. Lift the rear of the laptop slightly with a stand so air can reach the underside vents.
Clean the vents and fan grilles with short bursts of compressed air from outside the case, holding the can upright and keeping the bursts brief so liquid does not spray out.
Do not open the case unless you are comfortable doing so and the manual allows it, and never use a vacuum cleaner on the vents, since it can spin fans too fast and cause damage.
A cooling pad helps modestly by improving airflow under the laptop, and it is worth trying if your laptop throttles on a desk but not in a cooler room.
It will not turn a weak cooling design into a strong one, and it cannot fix a fan that has failed or a heatsink clogged with dust inside the case. If temperatures stay high after cleaning, or the fan rattles, grinds or stops, that is a repair job, not a settings problem.
Our guides on how to stop a laptop from overheating and how to keep a gaming laptop cool cover the cleaning steps, power settings and warning signs in more detail, and the same advice applies to a normal laptop you are pushing harder.
Also check the power plan interaction with heat. Best performance mode pushes the hardware harder and makes more heat, so if a game stutters only after ten minutes, try Balanced mode and see whether steadier, slightly lower performance actually feels better.
A stable 45 frames per second beats a frame rate that swings between 90 and 20 as the laptop heats and cools.
Step 6: Tune In Game Settings in the Right Order
Once Windows, drivers, RAM and cooling are sorted, in game settings decide how much of your hardware budget each visual feature gets. Changing settings at random wastes time, so work in this order.
Lower resolution first if the game is unplayable, but try upscaling before you drop resolution all the way.
NVIDIA DLSS, AMD FSR and Intel XeSS render the game at a lower internal resolution and upscale it to your screen resolution, which can recover a large amount of frame rate with a much smaller loss in image quality than simply running at a low resolution.
If the game offers an upscaling option, try its Quality or Balanced preset before turning shadows and textures down. These features need a compatible graphics chip and driver, so if the option is missing, your hardware does not support that upscaler.
Next, lower the settings that cost the most and matter least in motion: shadows, reflections, volumetric lighting and anti aliasing. Keep textures at a level your graphics memory can hold, because textures above that limit cause stuttering as data swaps in and out, while textures below it look soft for no benefit.
Turn off motion blur and depth of field if you dislike them anyway, since both cost performance for an effect many players switch off.
Cap the frame rate at your screen refresh rate, or a little below it, if the laptop runs hot or the frame rate swings wildly. An uncapped frame rate makes the hardware work at full speed even in menus, which adds heat for no visible benefit on a 60 Hz screen.
Turn VSync on if you see screen tearing, or use the adaptive sync option if your screen supports it. Finally, play at the same settings for a full session before judging them, because a cold laptop always looks faster in the first two minutes than it does after twenty.
Step 7: Consider an External Graphics Card, Only If Your Laptop Qualifies
An external graphics card, or eGPU, is the only realistic way to add desktop class graphics to a laptop, and it is also the upgrade most people should not buy.
It only works if your laptop has the right port, it costs as much as a budget graphics card plus an enclosure, and it loses some performance to the connection itself.
The requirement is a Thunderbolt 3 or Thunderbolt 4 port, or a USB4 port rated at 40 Gbps, that supports external graphics. A plain USB-C port is not enough, even if the shape matches. Check the port for the Thunderbolt lightning symbol and confirm external graphics support in your laptop specifications or manual.
Thunderbolt 3 and 4 both provide up to 40 Gbps of bandwidth, which is far less than the internal PCIe connection a desktop graphics card normally uses, so an eGPU typically delivers less performance than the same card inside a desktop.
Expect a modest loss at 1080p and a smaller loss at higher resolutions, where the graphics card itself becomes the limit.
Budget honestly. An enclosure alone often costs a few hundred dollars, and the desktop graphics card is on top of that. You also need an external monitor for the best result, because playing on the laptop internal screen sends frames back over the same Thunderbolt link and costs extra performance.
Check that the enclosure power supply can handle your chosen card, that the card physically fits, and that your laptop maker supports Thunderbolt external graphics in BIOS or firmware. Apple Silicon Macs do not support eGPU setups, so this path is for Windows laptops with Thunderbolt and for older Intel Macs only.
An eGPU makes sense in one situation: you already own a good Thunderbolt laptop you want to keep for portable work, you play at a desk with an external monitor, and the total cost is still clearly below a new gaming laptop with similar graphics.
If you need portability for gaming, or your laptop lacks Thunderbolt, put the same money towards a dedicated gaming laptop instead.
Step 8: Know When to Buy a Gaming Laptop Instead
There is a point where upgrading stops being good value, and recognising it saves more money than any tweak. Use these rules to decide.
Buy a gaming laptop instead if your laptop has a processor more than about eight years old, soldered RAM stuck at 8 GB or less, no Thunderbolt port, and integrated graphics that fall below the minimum requirements of the games you want.
No combination of settings, RAM or cooling can fix a graphics chip that is simply too weak, and spending enclosure money on such a laptop leaves you with an expensive box attached to a weak processor.
If your budget for that replacement is tight, compare the current best gaming laptops under 500 before you pay for an enclosure and a desktop card for a laptop that is already too weak.
Also buy instead if the repair bill approaches the price of a replacement. A failing battery, a broken fan, a damaged screen and a needed RAM upgrade together can cost more than a budget gaming laptop that is faster in every way.
Compare the full cost of the upgrades you actually need, not just the cheapest one, with the price of a laptop that meets recommended requirements for your games.
If you do buy, keep the old laptop for work, study and travel. A normal laptop that runs office work, browsing and lighter games well is still useful, and it will last longer once gaming heat and full load sessions move to the new machine.
If you are unsure which side of the line you sit on, work through Steps 1 to 6 first. They cost nothing, they tell you exactly which part holds you back, and they make any laptop you buy later run better too.
Frequently Asked Questions
Can I turn any normal laptop into a gaming laptop for free?
You can improve any laptop for free with settings, driver updates and background app cleanup, but you cannot give it graphics power it does not have. Free tweaks help most when the laptop is held back by power saving, the wrong graphics chip or background load. They help least when the graphics chip itself is below a game minimum requirements.
Is 8 GB of RAM enough for gaming on a normal laptop?
8 GB is enough for lighter and older games, but it is tight for modern releases, especially with a browser or chat app open at the same time. 16 GB in dual channel mode is the sensible target for most players, because it removes memory stutter and feeds integrated graphics faster. Check your manual first, since soldered RAM cannot be upgraded.
Can I upgrade the graphics card inside my laptop?
On most laptops, no. The graphics chip is soldered to the motherboard, so it cannot be swapped like a desktop card. The realistic alternatives are an external graphics card through Thunderbolt on supported laptops, or a new laptop with stronger graphics. Always confirm Thunderbolt external graphics support in your laptop specifications before buying an enclosure.
Does a cooling pad really help a laptop run games better?
A cooling pad helps when heat is the limit, by improving airflow and delaying the point where the processor slows down to protect itself. It will not fix a failed fan, a clogged heatsink inside the case or a graphics chip that is simply too weak. Clean the vents first, then test with and without the pad at the same settings.
Should I buy an external graphics card or a new gaming laptop?
Buy an external graphics card only if your laptop already has Thunderbolt external graphics support, you play at a desk with an external monitor, and the enclosure plus card cost stays well below a comparable gaming laptop. Otherwise a new gaming laptop gives you stronger graphics, better cooling and portability in one purchase, with no bandwidth loss from an external link.
The Verdict
Turning a normal laptop into a gaming laptop is a sequence, not a single trick. Start free: plug in, set Best performance, turn on Game Mode, force the game onto the dedicated graphics chip, update the driver from your laptop maker or chip maker, and close background apps.
Then fix the hardware you can change: dual channel RAM to 16 GB and an SSD if you do not have them, clean vents and steady cooling. Tune in game settings in order, using upscaling before you gut image quality, and cap the frame rate where heat makes performance swing.
Only then judge whether an external graphics card or a new laptop is justified. If your laptop has Thunderbolt and a decent processor, an eGPU can be a genuine desk setup upgrade.
If it does not, or if the processor and graphics chip are both far below modern game requirements, a dedicated gaming laptop is the honest answer.
Either way, the free steps in this guide leave you with a faster, cooler laptop and a clear reason for the next purchase, which is a better result than guessing and spending on the wrong part first.