How to Change HDMI Output to Input on a Laptop
You plug an HDMI cable from a games console, a camera, or another computer into your laptop, and nothing happens. The laptop screen stays exactly as it was, and the other device behaves as if nothing is connected.
It feels like a setting must be wrong, or a cable must be faulty, but in most cases neither is true. The port itself is the problem, because the HDMI port on almost every laptop is built to send video out, not to receive video in.
This guide gives the honest answer first, then the working routes. You cannot turn a normal laptop HDMI output into an HDMI input with a cable, a setting, or a piece of software, because the hardware for receiving video is simply not behind that port.
What you can do is add an input in another way, and for most people that means a USB capture card, or streaming the other device over your home network.
Both routes are explained step by step below, along with the rare exception of older laptops that really did ship with an HDMI input, and the products that look like a fix but will not help.
Quick Answer: You cannot change a laptop HDMI output into an HDMI input, because the port is wired to send video out and has no receiver hardware for incoming video. To show another device on your laptop screen, use a USB capture card, which takes the other device HDMI signal and delivers it to the laptop over USB, or stream the device with its own app, such as PS Remote Play for a PlayStation console. A direct HDMI cable between two outputs will never show a picture, no matter which cable or adapter you try.
Why a Laptop HDMI Port Cannot Be Switched to Input
HDMI is often talked about as if it were a two way street, but for video it has a clear direction. One device is the source, and it creates the picture. The other device is the display, and it receives the picture and shows it. A laptop is a source.
Its graphics chip renders frames and pushes them out through the HDMI port to a TV, a monitor, or a projector. A TV or a monitor is a display. It has receiver hardware behind its HDMI input that takes the incoming signal, decodes it, and paints it on the screen.
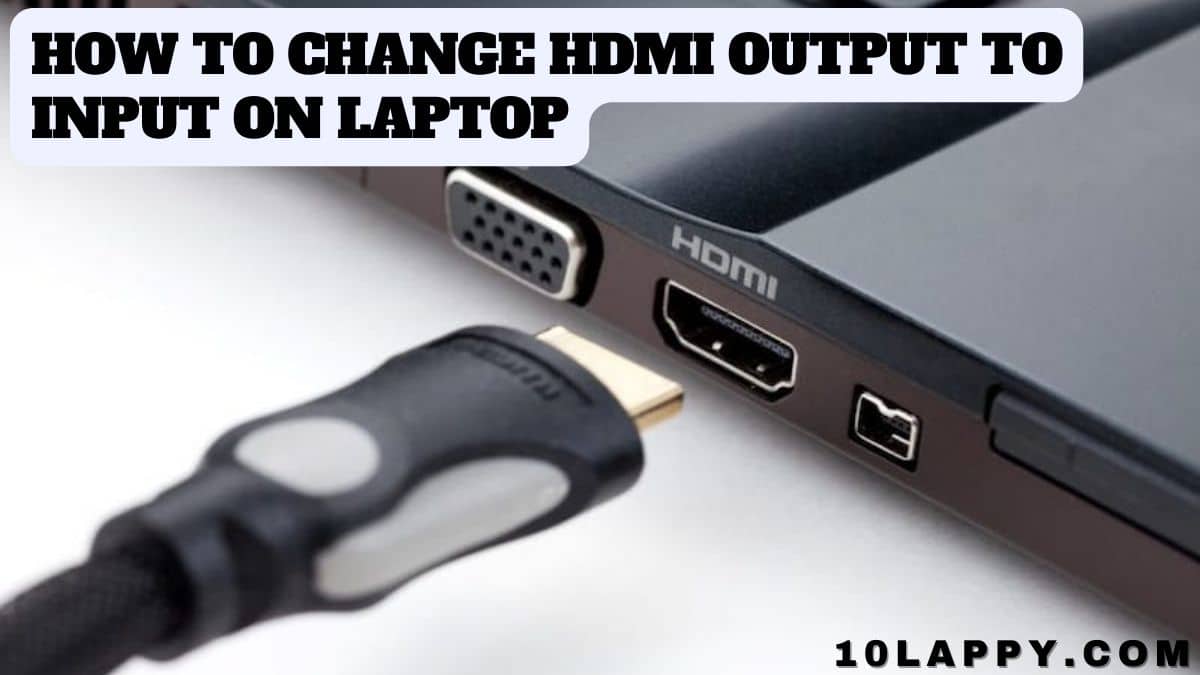
A normal laptop does not have that receiver hardware behind its HDMI port. There is no chip waiting to digitise an incoming signal, and no path from the HDMI jack to the built in panel that could carry someone else picture. That is why no setting can flip the direction.
The port is not locked by software. It is built as an output, and software cannot create hardware that is not there. Dell port documentation makes the same point in plain language for its current laptops.
On the Alienware m16 R2, for example, the HDMI 2.1 port is described as providing video and audio output to a TV, an external display, or another HDMI in enabled device. The words matter. The laptop is the device sending the signal, and the other device is the one with the input.
The same logic explains why a USB-C to HDMI adapter does not help either. That adapter also carries video out of the laptop. It changes the connector shape, but it does not change the direction of the signal, and it does not add a receiver.
A passive cable, however well made, cannot change what the port is wired to do. If you join two outputs together, a console HDMI output to a laptop HDMI output, each end is waiting for the other end to receive, and nothing is received at all. The blank screen is not a fault.
It is the expected result of connecting two sources.
This is also why the search for a simple fix goes in circles. People try a different cable, a different adapter, a BIOS setting, and a display setting, and none of them works, because none of them addresses the missing receiver.
Once you accept that the port itself cannot be changed, the choice becomes much simpler. Either add a real input with a capture card, or avoid HDMI altogether and stream the picture over the network.
Everything else is a distraction, and the later section on products that will not work explains each of those distractions so you do not spend money on them.
How to Check Whether Your Laptop Already Has an HDMI Input
Before you buy anything, it is worth spending two minutes checking whether your laptop is one of the rare exceptions.
Almost every current laptop is output only, but a small number of early 2010s gaming laptops did ship with a genuine HDMI input, and if you own one of them, you do not need a capture card at all.
Start with the label beside the port. A genuine input is usually labelled HDMI IN, HDMI Input, or HDMI In/Out, and it may sit beside a separate HDMI output port. A port labelled only HDMI, HDMI 2.0, or HDMI 2.1, with no mention of input, is an output.
The absence of a label does not prove anything on its own, because some makers leave ports unlabelled, but a clear HDMI IN label is a strong sign that you have the real thing.
Next, check the spec sheet for the exact model, not just the brand. Search the maker support site for your model number and look at the ports section. A laptop with an input will list it as HDMI input or HDMI in/out. A plain HDMI entry means output.
The manual is the final word, because it will say whether the port accepts an external signal and, on some models, which key switches the screen to that input.
Do not rely on a shop listing or a forum post for this check, because shop listings often copy the word HDMI without saying which direction it works in.
The older models that are most often named in this context are a small group of Alienware gaming laptops from the early 2010s, including:
- the M17x R3 and M17x R4
- the M18x R1 and M18x R2
- the Alienware 17 and Alienware 18 from around 2013
Some of those models had separate input and output ports, and some had a single port that could be toggled, often with a function key combination. Dell dropped the feature from later models, and no mainstream current laptop has brought it back in the same form. That history matters for two reasons.
First, it explains why older forum threads sometimes say that HDMI input on a laptop is possible. For those specific old models, it was. Second, it explains why that advice does not apply to your laptop.
A feature that existed on a 2012 gaming laptop does not mean it exists on a 2024 or 2025 laptop from the same brand.
There is one more check that sounds sensible but does not work. Plugging a console into the laptop and waiting to see if the laptop asks you to enable an input device proves nothing if nothing appears, and it can mislead you if the console simply shows its own home screen on a TV elsewhere.
The reliable test is the manual and the spec sheet. If neither one mentions an HDMI input, treat the port as output only and move on to the methods below, rather than spending an afternoon swapping cables in the hope that one of them will unlock a hidden input.
At a Glance: The Routes That Work and the One That Does Not
| Method | What you need | How it works | Best for |
|---|---|---|---|
| USB capture card | USB capture card or dongle, HDMI cable, USB port, viewing software such as OBS Studio | Card receives the HDMI signal and sends it to the laptop over USB as a video device | Consoles, cameras, and any HDMI source, with the lowest lag of the add on routes |
| Streaming or remote play app | The source device app on the laptop, same network or internet connection, controller if gaming | Source device streams its picture over the network and the laptop shows it in an app | PlayStation, Xbox, and PC games where no extra hardware is wanted |
| Built in HDMI input on a rare older laptop | An older laptop model that shipped with HDMI IN, HDMI cable | Laptop screen switches to the external input directly | Owners of the early 2010s Alienware models listed above |
| Direct HDMI cable between two outputs | HDMI cable only | No working route, because both ends are outputs and neither can receive | Nobody, and this is the method to stop trying |
Method 1: Use a USB Capture Card, Step by Step
A USB capture card is the most reliable way to give a laptop an HDMI input, because it adds the missing receiver hardware outside the laptop. The card itself has a real HDMI input.
It takes the picture from the source device, turns it into a USB video signal, and the laptop treats it much like a webcam. Viewing software then shows that video on the laptop screen, and you can watch it, record it, or stream it.
This is the same idea behind the Nintendo Switch setup explained in the guide to connecting a Nintendo Switch to a laptop, where a capture card is the only wired route that works, because the Switch HDMI output cannot go straight into a laptop HDMI output.
Start by choosing a card that matches what you want to watch. Most inexpensive USB capture dongles accept an HDMI input of up to 4K at 30 frames per second and capture at 1080p at 60 frames per second.
That is enough for smooth console gameplay and for camera work on a laptop screen, and it matches what many capture device manuals state for their basic models.
If you need true 4K capture rather than 4K input with 1080p capture, check the capture resolution in the specs, not just the input resolution, because the two numbers are often different and the smaller one is the one that decides what you actually see and record.
For a first setup, a simple USB dongle is easier than a larger card with extra ports, and it is also easier to move between laptops.
Use a USB 3 port on the laptop, not a USB 2 port and not a USB hub, for the first setup. Capture device manuals repeat this advice for a reason.
A USB 2 connection can still work, but it is more likely to limit the frame rate and to add delay, and a hub can cause the device to be detected unreliably.
Plug the card directly into the laptop, and if the card came with a USB-C adapter, use that adapter rather than a long extension cable. A short, direct connection removes the most common cause of a flickering or missing picture before you even open any software.
Connect the HDMI cable next, and get the direction right. Plug one end into the HDMI output of the source device, such as a PlayStation, an Xbox, a Nintendo Switch dock, a camera, or a set top box, and plug the other end into the HDMI input on the capture card.
The input on the card is usually labelled HDMI IN or Input. Some larger cards also have an HDMI output, called a loop out or pass through, which lets you send the same signal to a TV or monitor at the same time.
You do not need the loop out for a laptop only setup, so leave it empty unless you want a second screen for lag free monitoring.
Power on the source device after the cables are connected, and set it to output a resolution the card supports, starting with 1080p if you are unsure, because an unsupported resolution is a common cause of a black preview window.
The same wiring applies to an older console, so read the guide to playing Xbox 360 games on a laptop if that is the device you plan to connect.
Now open viewing software on the laptop. OBS Studio is the usual free choice, and capture device manuals use it as the example because it is available for Windows, Mac, and Linux. Install OBS Studio from its official site, open it, and look at the Sources box at the bottom of the window.
Click the plus sign, choose Video Capture Device, and give the new source a name, or accept the default name and click OK. In the properties window that appears, open the Device dropdown and choose the capture card.
It will usually appear under a name such as USB Video, USB3.0 Video, or the card brand name, rather than under a name that mentions HDMI. Once you select it, the source device picture should appear in the OBS preview.
Set the picture size and frame rate to match the card. In the same properties window, you can usually set the resolution and frame rate, and 1920 by 1080 at 60 frames per second is a sensible starting point for a card that supports it.
If the picture looks stretched, check that the resolution matches the source output, and if the preview is black, check the cable direction and the source power before changing software settings.
For sound, add an Audio Input Capture source in OBS if the video source does not already carry audio, and choose the capture card audio device from the list.
Some cards carry audio through the same USB connection, and some need that separate audio source step, so a silent preview does not always mean the video connection failed.
To watch full screen, right click the preview in OBS and look for the fullscreen projector option, or use the Fullscreen Projector choice from the preview menu. That turns the laptop screen into a display for the source device, which is what most people want when they ask about changing HDMI output to input.
The laptop is still not receiving video through its own HDMI port, but the effect on screen is the same. You can play, watch, or present from the source device while the laptop shows its picture.
If you want to record or stream at the same time, OBS can do that from the same source, but for a first test, just getting a stable full screen picture is enough.
There are two limits to understand before you judge this method. The first is delay. A capture card adds a small amount of lag, because the picture has to be received, converted to USB, and drawn by software.
On a decent USB 3 card, that delay is small enough for most single player games, for watching video, and for camera monitoring, but it can matter in fast competitive games where timing is tight.
If you play competitively, use the loop out port to a real monitor or TV for the game itself, and use the laptop preview only for recording or streaming. The second limit is copy protection.
Many capture devices refuse signals protected by HDCP, which is the copy protection used by Blu-ray players, some set top boxes, and some streaming devices. When HDCP blocks a signal, the preview stays black even though the cables are correct.
For a PlayStation console, the usual fix for your own gameplay is to turn HDCP off in the console system settings, where the console allows it.
Do not buy a device that claims to strip HDCP, because that is a different problem from using your own console as a display, and it is not needed for normal gameplay capture.
Method 2: Stream the Device to the Laptop Instead of Using a Cable
If you do not want to buy hardware, streaming is the free route, and for consoles it is also the route the console maker itself documents. The idea is simple. The source device keeps doing the work, and it sends its picture over your home network to an app on the laptop.
The laptop never receives an HDMI signal at all, so the direction of its HDMI port stops mattering. The price is dependence on the network. A weak Wi-Fi signal will show up as stutter, blur, or delay, in a way that a wired capture card will not.
For a PlayStation console, the official route is PS Remote Play. Sony describes Remote Play as a way to control a PlayStation console remotely wherever you have a high speed internet connection, and its example is a computer in another room.
The console must still exist and be switched on or in rest mode, because the laptop is only showing the console screen, not replacing the console. On a PS5, go to Settings, then System, then Remote Play, and turn on Enable Remote Play.
On a PS4, the equivalent setting is in the Remote Play connection settings. Then install the PS Remote Play app on the laptop from the official PlayStation site, sign in with the same PlayStation Network account as the console, and connect.
Sony lists Windows 10 or Windows 11, a 7th generation Intel Core processor or later, at least 2 GB of RAM, and a display of 1024 by 768 or higher for a Windows laptop.
And it recommends at least 5 Mbps upload and download for a standard connection and at least 15 Mbps for best performance. Those numbers are useful as a floor, not as a promise.
A wired Ethernet connection for both the console and the laptop will beat Wi-Fi for stability, and a 5 GHz Wi-Fi band will usually beat a crowded 2.4 GHz band.
The same idea works for other consoles and for PCs. An Xbox console can be streamed to the Xbox app on a Windows laptop, and a gaming PC can be streamed with Steam Link, which is designed for exactly this job of showing one device screen on another device over the network.
If the source is another Windows PC rather than a console, Windows wireless display is another option. On the receiving laptop, open the wireless display settings, and on the source PC, press the Windows key plus K to choose the laptop as a wireless display. All of these routes share the same rule.
Both devices need to be on a network that can carry video smoothly, and both need to be signed in or paired correctly before the picture will appear.
A guide to using a laptop as a monitor for PS4 covers the PS Remote Play route in detail, and a guide to playing PS4 on a laptop with HDMI explains why the capture card route is the wired alternative when streaming is not smooth enough.
Streaming has clear strengths and clear limits. It costs nothing beyond the devices you already own, it needs no extra cable, and it works from another room, which a capture card cannot do. It also lets you use the laptop keyboard, mouse, or a controller connected to the laptop, depending on the app.
Its limits are lag and quality. Even on a good home network, streamed video is compressed, so fast motion can look softer than a direct capture card picture, and a busy network can cause pauses. For story games, for watching, and for casual play, that trade off is usually fine.
For competitive play, or for work where every frame matters, a wired capture card will feel better. Choose streaming when convenience matters most, and choose a capture card when picture stability matters most.
Method 3: Using a Laptop That Already Has an HDMI Input
If your check in the earlier section found a genuine HDMI input, the setup is refreshingly simple, and it is the only case where a direct HDMI cable is the right answer.
Connect an HDMI cable from the source device HDMI output to the laptop HDMI input, not to its output port if it has both.
On some older Alienware models, you then switch the laptop screen to the external input, often with a function key combination such as Fn plus F8, or through a display input option described in the manual.
The laptop screen should then show the source device directly, with no capture software and no network involved, because the laptop is acting as a real display for that input.
Treat this method as an exception, not as a model for other laptops. It works only because those specific old models were built with receiver hardware and a screen path for an external signal.
It does not mean that a similar key combination will unlock an input on a modern laptop, and pressing function keys at random will not create one.
If the manual for your exact model does not describe an HDMI input or a switch to an external input, do not keep hunting for a hidden key combination. You are back to the capture card or streaming routes, and that is normal for a current laptop.
There is also a practical point about age. Even if you own one of the older models with an input, the laptop itself is now more than a decade old, and its screen, battery, and performance will reflect that.
It may still be a useful second display for a console in a spare room, but it is not a reason to buy an old laptop today just for this feature.
A modern laptop plus an inexpensive capture dongle will usually give a better screen, better performance, and a simpler setup than hunting down a rare old model with a built in input. The built in input is worth using if you already have it, and it is not worth chasing if you do not.
What Will Not Work, Even Though It Looks Like It Should
A large part of the confusion around this topic comes from products whose names sound like they solve the problem. An HDMI switch, for example, lets several HDMI sources share one HDMI input on a TV or monitor.
It does not create an input on a laptop, and connecting a switch between a console and a laptop still joins two outputs to a device that has no input to switch to. An HDMI splitter does the opposite job. It sends one source to several displays.
It also does not turn a laptop output into an input. A switch and a splitter are both useful on a TV setup, and neither one changes what a laptop port can do.
A passive HDMI to USB cable is another common false fix. A cable with an HDMI plug on one end and a USB plug on the other, with no chip in the middle, cannot convert an HDMI video signal into USB video.
The laptop USB port expects data, not a raw HDMI signal, and the cable has no electronics to translate between them. That is exactly what a capture card does, and it is why a capture card costs more than a cable and has a small box or dongle in the middle.
If a listing promises HDMI to USB conversion with just a cable and no electronics, treat it as a cable that will not do the job, however convincing the listing sounds.
A BIOS setting will not help either. Some laptops let you change display related settings in BIOS, such as which display is primary, or whether a discrete graphics chip is used, but no BIOS setting can add a receiver chip that is not fitted, or rewire a port from output to input.
The same applies to Windows display settings and to graphics control panels. Those settings control what the laptop sends out, and how it arranges its own screens. They do not control what the laptop can receive through HDMI, because there is nothing to receive with.
If a video or a forum post claims a hidden BIOS toggle for HDMI input on a normal laptop, it is describing a different feature, or it is simply wrong.
Software alone cannot fix this either. No app, driver, or Windows update can make an output port receive video, because the missing part is hardware. Apps can only show video that already arrives through a real input, such as a capture card over USB, or over the network through streaming.
That distinction is useful when you read claims online. If a method needs no extra hardware and no network, and it promises to turn your laptop screen into a display for a console through the HDMI port alone, it is promising something the hardware cannot do.
Save the time you would spend on it, and put it into the capture card setup or the streaming setup instead.
How to Choose a Capture Card Without Overpaying
You do not need the most expensive capture card to get a good result, but you do need to check a few specs before you buy, because the cheapest dongles and the professional cards are built for different jobs. Start with the capture resolution and frame rate, not the input resolution alone.
A card that accepts 4K input but captures at 1080p at 60 frames per second is fine for most laptop viewing and recording, and it is the common spec for inexpensive dongles.
A card that captures at 1080p at 30 frames per second will look less smooth for fast games, and a card that only captures at 720p will look soft on a modern laptop screen.
Match the capture spec to what you will actually watch, and do not pay for 4K capture unless you plan to record or stream in 4K.
Next, check the connection type. A USB 3 card or dongle is the sensible default, because it has the bandwidth for 1080p at 60 frames per second with less delay than USB 2.
A USB-C card is convenient on a modern laptop with only USB-C ports, but the important part is still the USB speed behind the connector, not the shape of the plug. Check whether the card needs a driver or is plug and play as a standard USB video device.
Most simple dongles are plug and play on Windows and Mac, and they appear as a webcam style device, which is why they work in OBS Studio, in video call apps, and in other capture software without special setup.
Larger cards may come with their own software, which can be useful, but it is not required for basic viewing.
Loop out, also called pass through, is worth having if you play games seriously. It lets you connect a TV or monitor to the card at the same time as the laptop, so you can play on the lag free TV picture while the laptop records or streams the same signal.
If you only want to watch on the laptop, you can skip loop out and save money. Audio support is another check. Most cards carry audio over the same USB connection, but confirm it in the specs, and confirm whether the card has a headphone or microphone jack if you need it for commentary.
Finally, check the HDCP note in the manual. A card that states it does not support HDCP protected sources is being honest about a limit that applies to most cards in this class.
That limit matters for Blu-ray players and some streaming devices, but it does not block normal console gameplay once HDCP is turned off in the console settings where that option exists.
Avoid buying on resolution claims alone. A listing that shouts 4K without stating a capture frame rate, or that shows a console connected straight to a laptop with a plain cable, is not describing a capture card setup at all.
Read the specs section, look for the words capture resolution, USB 3, and UVC, which means the card follows the standard USB video class and should work without a special driver, and buy from a listing that states those numbers clearly.
A modest, well specified dongle will beat an impressive looking cable every time, because only the dongle actually contains an HDMI input.
How to Fix the Most Common Problems
A black preview in OBS Studio is the most common problem, and it usually has a simple cause. Check the cable direction first. The source HDMI output must go to the capture card HDMI input, and the card USB output must go to the laptop.
A reversed HDMI connection, or a cable plugged into a loop out port instead of the input port, will give a black screen with no error message.
Next, check that the source device is powered on and outputting a signal, and try 1080p output if the source is set to a resolution the card cannot capture. Then check the OBS source settings and make sure the Device dropdown actually lists the capture card, not the laptop webcam.
If the card does not appear at all, unplug it, plug it directly into a different USB 3 port without a hub, and wait a few seconds for Windows or macOS to detect it again.
No sound is the next most common complaint, and it is usually a separate setting from video. In OBS Studio, check whether the video source already includes audio, and if not, add an Audio Input Capture source and choose the capture card audio device.
Also check the laptop sound settings and the OBS audio mixer, because the audio may be arriving but muted or set to a very low level.
If you are using headphones, check whether the audio is going to the laptop speakers instead, and change the monitoring setting in OBS if you want to hear the source through the laptop while you watch.
A silent preview with a perfect picture is almost always an audio source or mixer setting, not a faulty card.
Lag or stutter usually points to the connection or to the laptop load. Move the card to a USB 3 port, remove any hub or extension cable, and close heavy programs that are competing for processor time, because capture software has to decode video in real time.
Lower the preview resolution or frame rate in OBS if the laptop is older, and test with a less demanding source, such as a camera or a menu screen, before blaming the card for game lag. For streaming, lag usually points to the network instead.
Move closer to the router, switch to a 5 GHz band, or use Ethernet for both devices if you can, and close downloads or video calls that are sharing the same connection.
If streaming stays choppy after those steps, a wired capture card is the honest upgrade, because it removes the network from the picture path entirely.
A picture that appears but flickers, or that drops out every few seconds, often means a loose cable end, a long or low quality HDMI cable, or a source resolution that sits on the edge of what the card supports.
Reseat both HDMI ends firmly, try a shorter HDMI cable for a test, and set the source to 1080p at 60 frames per second or lower.
Also check that the laptop is not switching power plans or putting USB ports to sleep, because a USB port that powers down will drop the capture device without warning.
On Windows, the USB selective suspend setting in the power options can cause exactly that symptom, and turning it off for a test will tell you quickly whether power management is involved.
Finally, remember the HDCP black screen. If the picture works for a console menu but goes black when you start a protected video app or a Blu-ray, or if a set top box gives a black screen from the start, HDCP is the likely cause.
That is not a fault in your setup, and no cable swap will fix it, because the protection is designed to block capture. For your own console gameplay, check the console system settings for an HDCP option and turn it off if the console offers that choice.
For protected commercial video, use the proper app on the laptop itself, or watch on a TV, rather than trying to capture a protected signal through a card that is not meant to receive it.
Which Method Should You Choose
The right method depends on what you are trying to show, and on how much lag you can tolerate. If you want to play console games on your laptop screen, and you want the most stable picture, choose a USB capture card.
It is a one time purchase, it works without a network, and it handles consoles, cameras, and other HDMI sources with the same setup. The small amount of added lag is acceptable for most games, and the loop out option covers competitive play if you add a TV or monitor later.
This is also the method to choose if your home Wi-Fi is weak, or if you want to record or stream gameplay while you play.
If you already own a PlayStation or Xbox console and you only want to play in another room, try streaming first, because it costs nothing and takes only a few minutes to set up.
It is also the best choice when you do not want extra hardware on the desk, or when the console and the laptop are in different rooms. Accept that the picture will depend on your network, and keep Ethernet or a strong 5 GHz connection in mind if the first test stutters.
A related guide to connecting two monitors to a laptop is useful here too, because once the streamed picture or the capture preview is on the laptop, the same Duplicate and Extend ideas decide whether you watch it full screen or alongside your other work.
If you own one of the rare older laptops with a genuine HDMI input, use it, because it is the simplest setup of all. Do not buy an old laptop just for that feature, and do not assume a modern laptop has it because an old model from the same brand did.
And if your goal is the opposite direction, sending the laptop screen to a bigger display, remember that the laptop HDMI output is already built for that job. A guide to connecting a laptop to a projector with USB explains the USB routes for that direction, and the distinction is the same in both cases.
Output ports send, input ports receive, and the right adapter or app bridges the gap when the port you have is not the port you need.
Frequently Asked Questions
Can I change my laptop HDMI output to input with a setting?
No. The HDMI port on almost every laptop is output only, and no Windows setting, BIOS setting, or graphics setting can add the receiver hardware needed for input. Settings can change what the laptop sends out, but they cannot make it receive video through HDMI. To show another device on the laptop screen, you need a USB capture card or a streaming app, not a setting change.
Can I use a normal HDMI cable to connect a PS5 or Xbox to my laptop?
No, not on a normal laptop. A direct HDMI cable joins the console HDMI output to the laptop HDMI output, and neither end can receive the other signal, so the screen stays blank. Use a USB capture card, with the console connected to the card HDMI input and the card connected to the laptop by USB, or stream the console with its official remote play app over your home network.
Does a USB capture card work with a Nintendo Switch?
Yes. Connect the Switch dock HDMI output to the capture card HDMI input, connect the card to the laptop by USB, and open the card as a video capture device in OBS Studio or similar software. The Switch must be docked, because the handheld USB-C port alone does not output HDMI in the same way, and the dock provides the HDMI output the card needs.
Why is my capture card preview black even though everything is connected?
The most common causes are a reversed HDMI connection, a source resolution the card cannot capture, a USB hub or USB 2 port limiting detection, and HDCP copy protection blocking the signal. Check the cable direction, set the source to 1080p, plug the card directly into a USB 3 port, and confirm the card appears in the viewing software device list. If protected video goes black while menus work, HDCP is the likely cause.
Is streaming or a capture card better for gaming on a laptop screen?
A capture card is usually better for picture stability, because it uses a wired USB connection and does not depend on your home network. Streaming is better for convenience and cost, because it needs no extra hardware and works from another room. For competitive games, a capture card with a loop out to a TV or monitor gives the lowest lag for play, while the laptop preview is used for recording. For casual and story games, streaming is often good enough.
The Verdict
You cannot change a laptop HDMI output into an HDMI input, and chasing a cable, an adapter, or a setting that promises to do it will only waste time and money. The port is built to send video out, and it has no receiver hardware for video coming in.
That single fact decides everything else in this guide, and once it is clear, the working options are straightforward.
For most people, a USB capture card is the best answer. It adds a real HDMI input outside the laptop, it works with consoles, cameras, and other HDMI sources, and it gives a stable wired picture on the laptop screen through simple viewing software.
If you do not want extra hardware, streaming with the console official app is a strong free alternative, as long as your home network can carry video smoothly.
And if you happen to own one of the rare older laptops that shipped with a genuine HDMI input, use that input directly, because it is the one case where a plain HDMI cable is the correct tool.
Pick the route that matches your device and your network, set the source to a resolution the card or app supports, and test with a short direct connection before you blame the hardware. The laptop screen can absolutely show another device, just not through the HDMI port you were hoping to reuse.