How to Clean Laptop Speakers Safely
Laptop speakers live in some of the dirtiest spots on the machine. The grilles sit beside the keyboard, along the front edge, under the hinge or on the underside, and every one of those places collects dust, crumbs, lint and skin oils day after day. The grille mesh that protects the tiny drivers underneath also traps that dirt, and as the layer builds up the sound has to push through it. The result is audio that gets quieter, flatter and more muffled over time, often so slowly that you only notice when a call or a video sounds wrong.
The good news is that dirty grilles are one of the easiest laptop problems to fix yourself. You need no special tools, no disassembly and no liquids. What you do need is a gentle hand, because the same openings that let sound out will happily let moisture, sharp objects and high pressure air in. This guide walks through the safe way to clean laptop speaker grilles, the mistakes that can turn a five minute job into a repair bill, and the quick software checks worth doing when clean grilles still sound muffled.
Quick Answer: Shut the laptop down and unplug it. Brush the grilles with a soft bristled brush, working across the mesh so dust lifts out instead of being pushed in. Lift stubborn specks off with cleaning putty or low tack painter’s tape, then wipe the area around the grilles with a dry microfiber cloth. If you use compressed air, keep the can upright, hold it a few inches away, aim at an angle and use short bursts only. Never spray liquid into the grille, never poke the mesh with anything sharp, and never blow into it with your mouth.
Signs Your Laptop Speakers Need Cleaning
Dirt on a speaker grille rarely announces itself all at once. The sound usually fades gradually, which is why people often blame the laptop, the app or their own hearing first. These are the signs that point at the grilles rather than at the hardware or the software.
Volume drops even though nothing changed. Music and voices that were clear at half volume a few months ago now need the slider much higher, and they still sound distant. A film of dust over the mesh acts like a blanket over the driver, and the higher frequencies that carry clarity are the first to be smothered.
One side sounds weaker than the other. Most laptops have a speaker on each side, and they do not collect dirt at the same rate. The side near your coffee, your snack hand or the edge of the desk usually clogs first, so the stereo image drifts and dialogue seems to lean toward the cleaner speaker.
The sound has turned dull or crackly. Voices lose their edge, music sounds like it is playing from another room, and loud passages may buzz or rattle as loose particles sitting on the mesh vibrate along with the sound.
You can see the problem. Hold the laptop under a bright light and look closely at the grille holes. Grey or dark specks packed into the mesh, lint caught along the edges and a general dusty film over the area are all visible evidence. If the grilles look dirty, they are almost certainly affecting the sound.
If none of these signs are present and the sound changed suddenly, for example straight after a Windows update or a new app install, skip ahead to the software section of this guide first. Sudden changes usually have a software cause, while slow changes usually have a dust cause.
Speaker Cleaning Methods at a Glance
| Tool or Method | What It Does | Safe for Grilles | Notes |
|---|---|---|---|
| Soft bristled brush | Sweeps dust and lint out of the mesh | Yes | First step for every clean; brush across the grille, not into it |
| Cleaning putty or gel | Lifts specks and crumbs out of the holes | Yes, with care | Press lightly and peel slowly; keep away from ports and vents |
| Painter’s tape | Picks up surface dust and loose grit | Yes | Use low tack tape only, dabbed on rather than rubbed |
| Compressed air | Blows loose dust clear of the grille | Yes, if used gently | Short bursts, can upright, a few inches away, aimed at an angle |
| Microfiber cloth | Wipes the deck and the area around the grilles | Yes | Use dry, or barely damp for the surrounding surface only |
What You Need
The whole job takes a handful of household items, and none of them should cost much. A soft bristled brush is the main tool: a clean makeup brush, a soft paintbrush or a purpose made electronics brush all work, as long as the bristles are soft and flexible rather than stiff. Stiff bristles can scratch the deck and can push dirt through the mesh instead of lifting it off.
Cleaning putty, sold as cleaning gel for keyboards and electronics, is the second most useful item. Pressed gently onto the grille and peeled away, it pulls specks out of the holes that a brush only moves around. Low tack painter’s tape does a similar job on flat grilles and is a good alternative if you already have a roll at home.
You will also want a clean microfiber cloth for the area around the speakers, and optionally a can of compressed air for the final pass. If you buy compressed air, treat it as a finishing tool rather than the main event, for reasons the next sections explain. That is the complete kit. Notice what is not on the list: no water, no sprays, no alcohol bottles, no pins and no cotton buds soaked in anything.

How to Clean Laptop Speakers, Step by Step
Shut down and unplug. Turn the laptop fully off, not just to sleep, and disconnect the charger and anything plugged into it. Every major manufacturer gives the same starting instruction for cleaning: Apple, HP, Dell and Lenovo all say to shut the machine down and unplug external power before you wipe or brush any part of it. Cleaning a powered laptop risks stray keystrokes at best, and it is not a risk worth taking for a job this quick.
Find every grille. Speaker openings hide in more places than people expect. Check both sides of the keyboard, the strip above the keyboard, the front lip of the base, around the hinge and the underside of the machine. Bottom firing speakers are easy to miss and often the dirtiest of all, because they sit closest to the desk. Clean every grille you find, not just the obvious pair.
Brush the loose dust away. With the laptop on a clean, flat surface, brush each grille with slow strokes across the mesh, following the direction of the holes rather than jabbing into them. Work from one end of the grille to the other and let the dust fall onto the desk, where you can wipe it up. Tilting the laptop slightly so the grille faces partly downward helps loose particles drop out instead of settling deeper. Repeat until the brush stops picking up visible dust.
Lift out stubborn specks with putty or tape. Roll a small ball of cleaning putty in your hands until it is soft, press it gently onto the grille so it just kisses the surface, then peel it straight back off. The specks stuck in the holes come away with it. Work across the whole grille, folding the dirty surface of the putty inward as you go. On flat metal grilles, a small square of painter’s tape dabbed on and lifted does the same job. Do not grind either material into the mesh; light pressure is all it takes, and heavy pressure can leave putty residue behind in the holes.
Use compressed air only as a light finish, if at all. If loose dust remains, hold the can upright and a few inches from the grille, aim at a shallow angle so the air sweeps across the openings, and use short bursts. Angled air pushes debris out and away; air fired straight down into the grille can push it deeper, onto the driver itself. Lenovo is explicit that a compressed air can is acceptable for crumbs and dust but an air compressor is not, and HP warns in its workstation guidance that too much air pressure can cause damage under delicate parts. Keep the bursts short, keep the can moving, and stop the moment the grille looks clear.
Wipe the surrounding deck. Run a dry microfiber cloth over the palm rests, the keyboard surround and the whole area around the grilles. This picks up the dust you brushed loose and stops it migrating straight back. If the deck itself is grimy, the cloth can be barely damp with water, but keep it well away from the grille openings and never let moisture sit on the mesh. While the laptop is shut down for this job, it is a natural moment to give the touchpad the same gentle treatment; our guide on how to clean a laptop mousepad and touchpad covers the safe method for that surface.
Let it dry, then test. If any part of the cloth was damp, give the laptop a few minutes to dry completely before switching it on; Lenovo and HP both stress that a cleaned machine must be fully dry before use. Then power up and play something you know well: a familiar song, a podcast voice or a film scene. Compare both sides at a moderate volume. Clear, even sound means you are done. Still muffled means either deeper dirt or a software cause, and the sections below cover both.
What Not to Do When Cleaning Laptop Speakers
Most speaker damage during cleaning comes from good intentions and the wrong tool. Every item on this list is a method that appears in older advice around the web, and every one of them risks the machine for no benefit over the brush and putty method above.
Never spray or pour liquid onto the grilles. Water, screen cleaner, alcohol and household sprays can pass straight through the mesh and reach the driver and the board beneath it. HP states it plainly in its maintenance guides: keep liquids away from the product and avoid getting moisture in any opening, because liquid inside can cause permanent damage. Apple gives the same rule for every product it makes: keep liquids away and do not get moisture into any openings. If a drink has been spilled near the speakers, that is a drying and possibly a repair job, not a cleaning job.
Never poke the mesh with pins, needles, toothpicks or a SIM ejector tool. The grille holes look like they invite a poke, but the driver sits millimetres behind them, and its thin diaphragm tears easily. A pin also tends to push the dirt through rather than remove it, so you end up with the same dirt in a worse place and possibly a punctured speaker.
Never blow into the grilles with your mouth. Breath carries moisture and saliva, and a close range blow drives loose dust deeper as often as it clears it. It is the worst of both worlds: wetter than a brush and weaker than canned air used properly.
Never hold a full power vacuum nozzle against the grille. A household vacuum on full suction can stress the mesh and the driver behind it, and HP goes further for the keyboard area, warning against vacuum cleaner attachments entirely because they can deposit household debris onto the surface. If you use a small handheld vacuum at all, keep it on its lowest setting, hold it slightly off the surface and treat it as a helper for dust the brush has already loosened, never as the main tool.
Never use a hairdryer or heat gun. Hot air can warp the thin plastic of the grille surround and stress the adhesives inside the speaker assembly, and it does nothing a brush cannot do better. The same goes for stiff wire brushes, scouring pads and anything abrasive: they scratch the deck and can deform the mesh.
Finally, never scrub aggressively. If dirt survives gentle brushing and putty, more force is unlikely to be the answer. Sticky residue from a spill, for example, often needs patience and repeated light passes with putty rather than one hard scrub, and truly packed grilles on an old machine are a case for a repair shop that can open the chassis safely.
Still Muffled? When the Problem Is Software, Not Dust
Cleaning only fixes dirty grilles. If the grilles look clean, or the sound changed overnight rather than over months, run through this short Windows checklist before you clean anything else. These checks follow the order Microsoft itself recommends in its support guidance for sound problems.
Check the output device. Click the speaker icon on the taskbar and make sure the output is set to your laptop speakers. Windows often switches output to a monitor, a dock or a headset when one is connected, and sound sent to a display with weak speakers can sound exactly like a dirty grille.
Check the volume mixer. Open Settings, then System, then Sound, then Volume mixer, and confirm neither the master volume nor the app you are using is turned down or muted. Per app levels are a common cause of one quiet program while everything else sounds fine.
Turn off audio enhancements. In Settings, System, Sound, select your speakers and set Audio enhancements to Off. Microsoft lists this as a primary fix because enhancement packages from Microsoft and from manufacturers can clash with drivers and produce muffled or distorted sound.
Check the balance. If one side is quieter, open the classic Sound panel, select your speakers, open Properties, then Levels, then Balance, and make sure the left and right values match. A balance slider knocked off centre mimics a clogged grille on one side almost perfectly.
Check mono audio. In Settings, Accessibility, Audio, look at the Mono audio toggle. Mono audio combines the left and right channels into one, which flattens music and makes it sound dull and narrow. It is a useful accessibility feature, but if it was switched on accidentally it will make clean speakers sound wrong.
Update or reinstall the audio driver. An out of date or corrupted driver can muffle or distort sound, so check Windows Update and the laptop manufacturer’s support page for a current audio driver. Microsoft also offers a built in audio troubleshooter under Settings, System, Troubleshoot, Other troubleshooters, which is worth running if the steps above change nothing.
If the sound stays muffled after the grilles are visibly clean and every check above passes, the likely causes are a failing driver board or a damaged speaker, and that is repair territory rather than cleaning territory.
How to Keep Laptop Speakers Clean for Longer
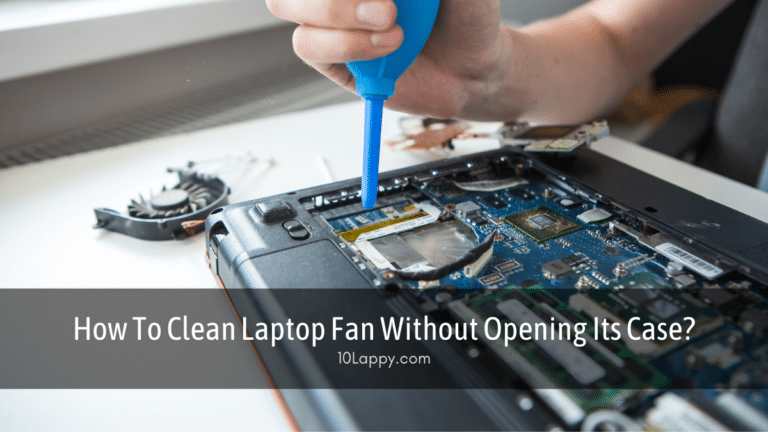
A two minute brush once a month is far easier than one deep rescue clean a year, so build the grilles into your normal laptop care routine. The same session that covers the speakers can cover the rest of the machine: the method in our guide to cleaning a sticky laptop keyboard keeps the keys responsive, and the vents deserve the same attention, because dust that settles on a desk bound laptop reaches every opening it has. Our walkthrough on how to clean a laptop fan without opening its case shows how to deal with the cooling side of that dust safely.
Where the laptop lives matters as much as how often you clean it. Desks collect crumbs, pet hair and dust fastest near where you eat, so keeping food and open drinks away from the machine removes the stickiest source of grille dirt before it starts. A laptop used on a bed or sofa picks up lint far faster than one used on a desk, because soft furnishings shed fibres directly into upward facing and downward facing grilles alike.
Carrying habits matter too. A laptop thrown loose into a bag shares space with keys, cables, paper and whatever else lives in there, and the grilles collect the fallout. A simple sleeve or a dedicated padded compartment keeps most of that debris away from the machine and protects the mesh from knocks at the same time.
Finally, make the brush pass a habit rather than a project. Keep the soft brush in the same drawer as the laptop bag, give the grilles ten seconds of attention whenever you notice dust on the keyboard, and the sound will stay clear with almost no effort. Prevention here is genuinely easier than the cure, because loose dust brushes off in seconds while packed, oily grime needs the full putty routine.
Frequently Asked Questions
How often should I clean my laptop speakers?
For most people, a light brush of the grilles once a month is enough to stop dust building up to the point where it affects sound. Laptops used on beds, sofas or workshop benches collect lint and grit faster and may need attention every couple of weeks. If the sound starts to fade or one side sounds weaker, treat that as the signal regardless of the calendar: a visible film of dust in the mesh means it is time, and a regular light clean is always quicker than rescuing a grille that has been packed with grime for a year.
Can compressed air damage laptop speakers?
Used carelessly, it can cause problems, which is why this guide treats it as an optional finishing step rather than the main method. A can held upright, kept a few inches away and fired in short angled bursts will clear loose dust safely. The risks come from long close range blasts aimed straight into the grille, which can drive dust deeper onto the driver, and from workshop air compressors, which Lenovo explicitly warns against for this kind of cleaning. If you are unsure, skip the air entirely: the brush and putty method clears the same dirt with no pressure involved at all.
Is cleaning gel or putty safe for speaker grilles?
Cleaning putty is widely used for keyboards and speaker grilles, and used gently it is safe: press it lightly onto the surface so it touches the tops of the holes, then peel it straight off so it lifts the specks out. The cautions are about technique rather than the material itself. Do not force putty deep into the mesh, because small pieces can tear off and stay behind, and keep it away from ports, vents and key gaps. No laptop manufacturer officially endorses a particular putty, so treat it as a practical household tool and stop if it starts leaving residue.
Can I use a vacuum cleaner to clean laptop speakers?
Not at full power, and not with the nozzle pressed against the grille. Strong suction concentrated on the mesh can stress the driver behind it, and HP explicitly warns against using vacuum cleaner attachments around the keyboard area because they can deposit household debris back onto the machine. A small handheld vacuum on its lowest setting, held slightly above the surface to collect dust that a brush has already loosened, is the gentlest version of the idea. Even then, the brush and putty combination does the same job with less risk, which is why it is the method this guide recommends.
Why do my speakers still sound muffled after cleaning?
If the grilles are visibly clean and the sound is still dull, the cause is usually software or hardware rather than dirt. Work through the checklist in this guide: confirm the output device is the laptop speakers, check the volume mixer, switch audio enhancements off, confirm the balance is centred and check that mono audio has not been turned on in the accessibility settings. An outdated audio driver is another common culprit. If all of those pass and the muffling remains, the speaker itself may be damaged or failing, which needs a repair assessment rather than more cleaning.
The Verdict
Clean laptop speakers are a five minute job that needs nothing more exotic than a soft brush, a ball of cleaning putty and a microfiber cloth. Brush across the mesh, lift the stubborn specks out instead of pushing them in, keep every liquid, pin and blast of high pressure air away from the openings, and your sound should come back clear and even. If it does not, the two minute software checklist in this guide will tell you whether you are chasing dust at all. Add a light brush to your monthly routine and the grilles will never get bad enough to muffle anything again.