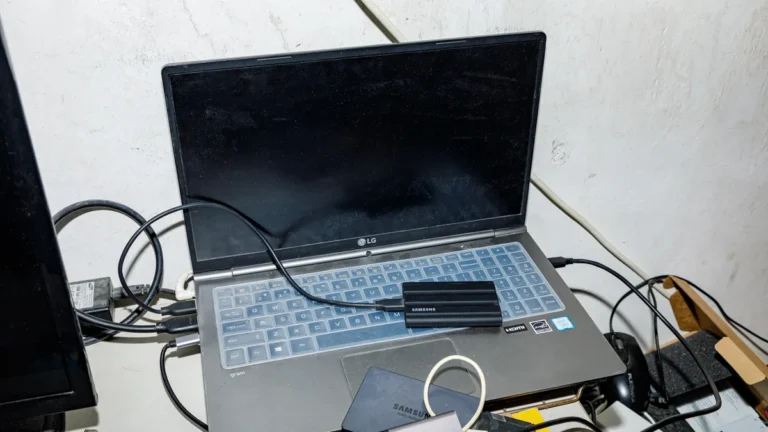
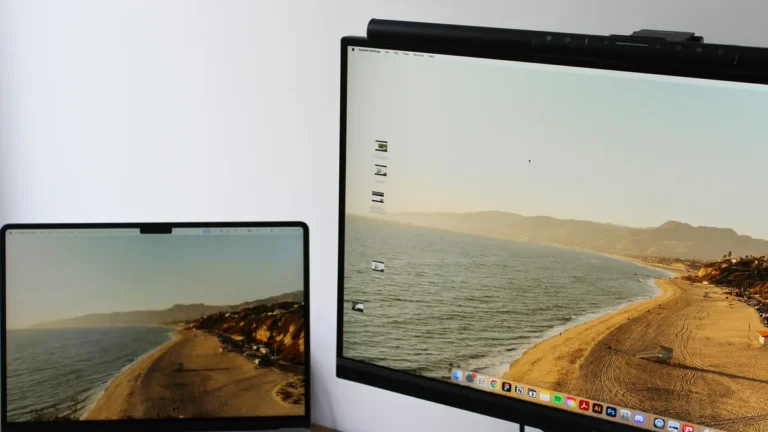
How to Connect a Nintendo Switch to a Laptop
You have a Nintendo Switch, a laptop with a perfectly good screen, and one obvious question: can the Switch play on that screen? The honest answer is yes, but not with the cable you are probably holding.
A plain HDMI cable between the Switch dock and your laptop will never work, no matter which way round you plug it in, and no setting on either device can change that.
What does work is a small piece of hardware called a capture card, which takes the picture from the Switch dock and feeds it into your laptop as a video signal the laptop can display, record and stream.
This guide explains the whole picture in plain terms. It covers why the direct cable fails, the capture card method step by step, how to set up the free OBS Studio software so you can play in its preview window, and what the experience is honestly like in terms of lag and picture quality.
It also lists the cables and adapters that promise an easy shortcut and cannot deliver one, explains the one situation where a USB cable between a Switch and a laptop genuinely is useful, and notes what changes, and what does not, if you own a Nintendo Switch 2 instead of the original console.
Quick Answer: A Nintendo Switch cannot show its picture on a laptop screen through a plain HDMI cable, because the HDMI port on a laptop sends video out and cannot accept video in. The working method is a USB capture card: run an HDMI cable from the Switch dock to the capture card, connect the card to the laptop by USB, and view the picture in free software such as OBS Studio. Expect up to 1080p at 60 frames per second with a small amount of delay, which suits most games and is ideal for recording and streaming. A USB cable on its own only transfers screenshots and videos, never live gameplay.
The Options at a Glance
| Method | What You Need | Lag and Quality | Best For |
|---|---|---|---|
| USB capture card, play in the laptop preview | Switch dock, HDMI cable, USB capture card, OBS Studio or the card software | Up to 1080p60, with a small delay added by the card and the USB connection | Playing on the laptop screen, recording and streaming |
| Capture card with HDMI passthrough | The same setup, on a card that has an HDMI output socket as well | Full quality on the TV with no added delay, while the laptop records the same picture | Serious play with recording or streaming at the same time |
| Dock connected to a monitor or TV | Switch dock and an HDMI cable only | Up to 1080p60 with no added delay at all | The best picture and response when a real display is available |
| USB cable media transfer | A USB data cable between the console and the laptop | No live picture at all, files only | Copying screenshots and gameplay clips to the laptop |
Why a Plain HDMI Cable Cannot Connect a Switch to a Laptop
Every failed attempt at this job starts with the same misunderstanding, so it is worth clearing up properly. HDMI connections have a direction. One end of the link sends the picture and sound, and the other end receives them.
The port on the Nintendo Switch dock is labelled HDMI OUT, and Nintendo’s own setup instructions describe it exactly that way: the cable runs from the HDMI OUT terminal on the dock to the HDMI port on a TV or monitor, which is a receiving input.
The dock is a sender, and a TV is a receiver, so the two work together.
Your laptop sits on the same side of that relationship as the dock. The HDMI port on a laptop is an output, wired to the laptop graphics hardware so the laptop can send its picture to a projector, a monitor or a TV.
It is not connected to the laptop screen as an input, and it cannot accept a picture from an outside device. Plugging a Switch dock into it joins two senders together, and two senders have nothing to say to each other.
The laptop shows nothing, the Switch shows nothing, and no driver, adapter setting or display option can reverse the direction of a port that was built one way.
We explain the hardware side of this in more depth in our guide to how to change HDMI output to input on a laptop, but the short version never changes: the port direction is fixed in hardware.
A tiny number of specialist laptops from years ago shipped with an HDMI input, and if you happen to own one of those rare machines the direct cable does work.
For everyone else, and that means effectively every laptop you can buy today, the signal has to enter the laptop through a door that accepts incoming video. A USB port fitted with a capture card is that door.
The Capture Card Method, Step by Step
A capture card is a small device, usually a USB stick or a compact box, with an HDMI input on one side and a USB connection on the other.
It takes the live picture and sound arriving on the HDMI side, converts them into a video stream a computer understands, and hands that stream to software on the laptop.
Streamers and video makers use these devices every day, and a Switch is one of the easiest sources to feed into one, because the docked console outputs a clean signal of up to 1080p at 60 frames per second. The same capture card method also works for playing an Xbox 360 on a laptop.
You need four things: your Nintendo Switch and its dock with the AC adapter, the HDMI cable that came with the Switch or any standard HDMI cable, a USB capture card, and software on the laptop to view the picture.
OBS Studio is free and is covered in the next section, and many capture cards also work with the software their maker provides.
If you plan to play fast games directly in the laptop preview, a card built for low delay is worth choosing; if your card has an HDMI output socket as well as an input, that passthrough feature lets a TV carry the live game while the laptop records, which is the arrangement most streamers use.
- Set up the dock exactly as Nintendo describes for a TV. Open the back cover, connect the AC adapter to the terminal labelled AC ADAPTER and plug it into a wall outlet, then close the cover once the cables are in place.
- Seat the Switch console in the dock with its screen facing the same way as the front panel of the dock. The console screen turns off when it is docked correctly, which tells you TV mode is active.
- Connect one end of the HDMI cable to the terminal labelled HDMI OUT on the dock.
- Connect the other end of the HDMI cable to the HDMI input of the capture card. If your card has two HDMI sockets, use the one marked as the input.
- Connect the capture card to a USB port on your laptop. Use a USB 3 port if you have one, since faster ports carry the picture with less compression and less delay.
- If your card has an HDMI passthrough output and you have a TV or monitor nearby, run a second HDMI cable from that output to the display. You can then play on the display with no added delay and use the laptop purely for recording or streaming.
- Open your viewing software on the laptop and add the capture card as a video source, following the OBS steps in the next section if you use OBS Studio.
- Wake the Switch with your controller. Its home menu should appear inside the software preview on the laptop screen, sound included.
One model is excluded from all of this. The Nintendo Switch Lite cannot be used with a dock and has no video output hardware at all, so there is no signal for a capture card to capture.
The Lite is a handheld only console, and the only Switch to laptop connection it supports is the file transfer covered later in this guide.
Setting Up the Preview in OBS Studio
OBS Studio is free, open source software published by the OBS Project at obsproject.com, and it is the standard tool for viewing, recording and streaming a capture card feed. Download it from that official site only, install it, and then work through these steps.
- Open OBS Studio. In the Sources panel at the bottom of the window, click the plus button.
- Choose Video Capture Device from the list, give it a name such as Switch, and click OK.
- In the properties window that appears, open the Device dropdown and select your capture card. The Switch picture should appear in the preview behind the settings.
- Set the resolution to 1920 by 1080 and the frame rate to 60 if those options are offered, matching what the docked Switch sends out. Leave the audio setting on its default unless the card exposes a separate audio device, in which case select it so game sound comes through.
- Click OK. Back in the main window, right click on the preview picture and choose Fullscreen Projector (Preview), then pick your laptop screen. The game now fills the display like a normal monitor picture, and this projector view is the one to play in, since it shows the feed directly rather than through the editing canvas.
- To record, click Start Recording in the Controls panel. To stream, add your stream details under Settings and then Output and Stream, and click Start Streaming instead.
- If the preview is black but the card is listed, check the simple things first: the console is awake and docked, the HDMI cable is in the card input rather than its output, and no other program is already using the card, since most capture devices can only feed one program at a time.
Sound deserves one note. The capture card carries the game audio to the laptop along with the picture, and OBS plays it through your laptop speakers or headphones once the source audio is set to be monitored or is simply heard through the recording and stream mix.
Your controller, meanwhile, talks to the Switch wirelessly as normal, so sit wherever the console range allows.
What to Expect: Lag, Resolution and Sound
Honesty matters here, because a capture card preview is not identical to a TV, and knowing the difference in advance saves disappointment. The picture quality itself is excellent.
A docked Switch sends up to 1080p at 60 frames per second, a modest signal by modern standards, and any competent USB capture card passes and records it cleanly at that full quality. Screenshots and recordings taken this way look exactly as they should.
The difference is delay. The card has to convert the signal, send it over USB and hand it to software, and each of those steps adds a little time between your button press and the response on screen.
With a decent card on a USB 3 connection the delay is small, often only a frame or two beyond a normal display, and for the majority of Switch games it is a non issue. Adventure games, role playing games, strategy, platformers played casually, party games and story driven titles all feel perfectly normal.
The games that expose the delay are the ones built on split second reactions: competitive fighting games, rhythm games and precision online shooters. There, even a small delay is noticeable, and serious players will feel it.
There are three practical ways to keep delay at its lowest. Connect the card to the fastest USB port on the laptop, since older USB 2 connections force heavier compression and add lag. Play in the OBS fullscreen projector view described above rather than a small editing preview.
And if your card offers HDMI passthrough, play on the TV or monitor it feeds, where the signal arrives with no conversion delay at all, and let the laptop handle the recording in the background.
Judged as what it is, a way to record, stream and use a laptop screen when no TV is free, the capture card route is genuinely good. Judged as a replacement for a proper display in a fighting game tournament, it is not, and no seller claim changes that.
Methods That Do Not Work
Search results and bargain marketplaces are full of shortcuts for this job, and they fail for reasons that are worth understanding once, so you never pay for the same lesson twice.
A direct HDMI cable between the dock and the laptop
Covered above, and still the most common attempt. The laptop HDMI port is an output, the dock is an output, and a cable cannot turn one of them into an input. Nothing appears on either screen.
The same rule applies to consoles generally, which is why our guide to using a laptop as a monitor for a PS4 reaches the same capture card conclusion for Sony hardware.
A USB-C cable from the console to the laptop
The USB-C port on the bottom of the Switch is how the console charges and how it talks to the dock, so it looks like a promising shortcut. It is not a display cable route to a laptop.
The console on its own does not send a live picture down a plain USB-C cable for a computer to show; TV mode video is a dock feature, produced when the console is seated in the dock and sent out of the dock HDMI terminal.
Plugged directly into a laptop, that USB-C cable gives you charging and the file transfer described later, and nothing on screen.
Cheap HDMI to USB cables and adapters
Listings for simple cables with an HDMI plug on one end and a USB plug on the other, sold as a way to show consoles on a laptop, are misleading in one of two ways.
Some are display adapters that work in the opposite direction entirely, sending a computer picture out to an HDMI screen, and are dead weight in this job.
Others are cut price capture sticks with the conversion hardware squeezed into the plug; a few of these do technically capture, but with heavy compression, low frame rates, unreliable software and delay that makes games miserable.
A capture device is a real piece of electronics with a processor inside, and if a listing does not clearly describe a capture device with software support, it is not one.
Playing through remote or cloud features
Some consoles offer an official feature that streams games from the console to a computer over your home network. Nintendo offers no equivalent for the Switch: there is no Nintendo app or setting that sends your Switch games to a laptop screen, locally or over the internet.
Anything advertised as doing this unofficially is not a Nintendo feature and is outside anything this guide can recommend.
A Note on the Nintendo Switch 2
If you own the newer console, the picture is reassuringly familiar.
Nintendo’s official support instructions for connecting a Nintendo Switch 2 to a TV describe the same arrangement: the console sits in its own Nintendo Switch 2 dock, powered by its own AC adapter, model NGN-01, and an Ultra High Speed HDMI cable runs from the dock to an HDMI port on a television or monitor.
Because the Switch 2 also sends its TV picture out of a dock over HDMI, the capture card method in this guide works the same way: dock HDMI output into the card, card into the laptop by USB, picture in your software.
Two Switch 2 specifics come straight from Nintendo’s documentation. First, use the Ultra High Speed HDMI cable that came with the Switch 2 for the dock connection; Nintendo warns that the HDMI cable from the original Switch is not Ultra High Speed and should not be used with the Switch 2 dock.
That cable plugs into the capture card just as it would into a TV. Second, the original Switch AC adapter cannot power TV mode through the Switch 2 dock, so keep the NGN-01 adapter that came with the newer console connected to its dock.
Beyond those points, treat any claim about Switch 2 capture resolutions or frame rates with care: the card, not the console, decides what your laptop receives, and most capture cards work at 1080p60, which is what your preview and recordings will be.
If You Only Need Your Screenshots and Videos
Plenty of people searching for this connection do not want to play on the laptop at all. They want the screenshots and clips saved on the Switch to end up on the computer, and for that job Nintendo provides an official, simple route that needs no extra hardware.
The Switch system software includes a feature called Copy to a Computer via USB Connection, and its steps are short.
- Connect the Switch console directly to the laptop with a USB cable. Nintendo specifies a USB charging cable, model HAC-010, or a USB-IF certified USB cable that supports data transfer, and states clearly that connection through the dock is not supported, so plug into the console itself, using the USB-C port on its bottom edge.
- On the Switch, open System Settings, then Data Management, then Manage Screenshots and Videos.
- Select Copy to a Computer via USB Connection. The console confirms when the connection is made.
- On the laptop, the Switch appears as a connected device. Open it, browse the album folders, and copy across whichever screenshots and videos you want. There is no Nintendo imposed batch limit on this route, which makes it the sensible choice for a large backlog.
- When you finish, choose Disconnect on the Switch screen before unplugging the cable.
The computer needs to support the Media Transfer Protocol for this to work, which Windows does as standard.
Nintendo also documents a wireless alternative for smaller batches: from the Album, the Send to Smartphone feature moves up to 10 screenshots and 1 video at a time to a phone by QR code, and from the phone the files can travel onward to the laptop.
Neither route shows a live game picture, and neither is a step toward playing on the laptop screen; they are file transfers, and for files they are exactly right.
Frequently Asked Questions
Can I connect my Nintendo Switch to my laptop with just an HDMI cable?
No. The HDMI port on the Switch dock is an output and the HDMI port on your laptop is also an output, so the two devices cannot exchange a picture over a direct cable. A laptop screen can only show an outside device through an input, and on a modern laptop that input is provided by a USB capture card. The rare exception is a handful of old specialist laptops that were built with an HDMI input, which almost no current machine has.
Can I use my laptop as a screen for a Nintendo Switch without a capture card?
There is no official way to do it. Nintendo documents one display route for the Switch, the dock connected by HDMI to a TV or monitor, and offers no feature that streams the console picture to a computer. Without a capture card your realistic options are to play in handheld mode or to connect the dock to a standalone monitor or TV, which needs no extra hardware at all and gives the best picture and response.
Does the Nintendo Switch 2 connect to a laptop the same way?
Yes, the method carries over. The Nintendo Switch 2 uses its own dock with an HDMI output, so the same capture card chain works: dock to card by HDMI, card to laptop by USB, picture in OBS or similar software. Follow Nintendo’s Switch 2 specifics when you set it up: use the Ultra High Speed HDMI cable included with the Switch 2, and power its dock with the NGN-01 adapter, because the original Switch adapter cannot support TV mode in the Switch 2 dock. Expect the capture itself to be 1080p60 on most cards, whatever the console can send to a TV.
Can I connect a Nintendo Switch Lite to my laptop to play on its screen?
No. The Switch Lite has no video output hardware and cannot be docked, so it produces no signal for a capture card or any other device to display. It is a handheld only console. The one Switch Lite to laptop connection that does work is Nintendo’s Copy to a Computer via USB Connection feature, which transfers screenshots and videos to the computer as files.
Why is there a delay when I play through the capture card preview, and how do I reduce it?
The delay comes from the conversion chain: the card digitises the HDMI signal, sends it over USB, and the software then displays it, and each step takes a little time. You can keep it small by using a USB 3 port on the laptop, by playing in the fullscreen projector view in OBS rather than the editing preview, and by choosing a card designed for low delay play. If a game demands perfect timing, use a card with HDMI passthrough and play on the TV or monitor it feeds while the laptop records, which removes the delay from your side of the setup entirely.
The Verdict
Connecting a Nintendo Switch to a laptop is a job with one real answer and several attractive dead ends. The dead ends all promise a single cable, and they all fail on the same fact: a laptop HDMI port only sends pictures out.
The real answer is the capture card, a modest piece of hardware that takes the dock HDMI output your Switch already produces and delivers it to the laptop as a proper video input.
Set it up with OBS Studio, play in the fullscreen preview, and you get a clean 1080p60 picture on your laptop screen with a small amount of delay that most games never make you think about, plus recording and streaming whenever you want them.
If you want to expand your laptop display in the other direction, our guide to connecting two monitors to a laptop covers that setup.
Save the simple USB cable for the job Nintendo actually built it for, moving your screenshots and clips, and if a television or monitor is within reach for a serious session, plug the dock into that and enjoy the one setup with no compromises at all.