There are a few simple and quick methods to take screenshots on a Sony laptop. This includes taking screenshots using the PrintScreen key, combination keys, Windows tools, and some software. All these methods allow you to take a high-quality screenshot on your Sony laptop.
Sony laptops do have common features like Dell and Hp. It is because they also run on the Windows Operating system. That is why the methods are the same. In this blog, we are going to discuss all the possible methods to take a screenshot.
Method 1: Using Combination Keys
Combination keys include the PrintScreen key and Windows key. In most of the Sony laptop models, you can find this key just above the enter key. There are various methods to use it for screenshot purposes. We are going to discuss a few of them. First of all the direct folder and edit method.
1. Direct Save To ScreenShot Folder
You can capture and save the screenshot directly to the screenshot folder. This requires the following procedure.
- Press PrintScreen and Windows Key at the same time. The difference in key pressing may not result in the screenshot.
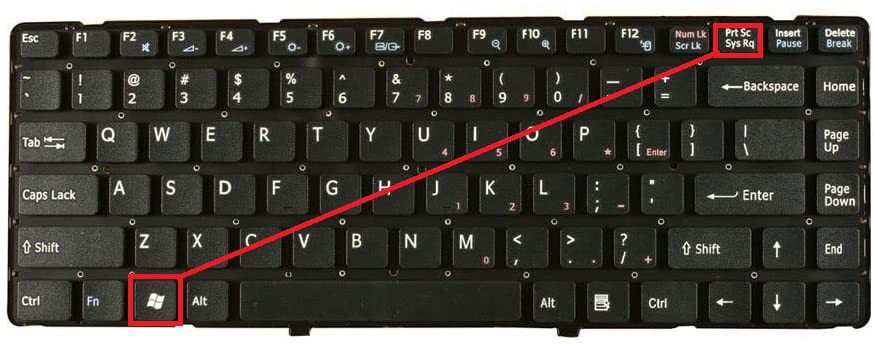
- Your laptop screen will blink for a second. This is the indication that your screenshot is captured and saved to the folder.
- Here is how you can locate the Screenshot folder.
- Go to “This PC” and locate the Pictures folder.
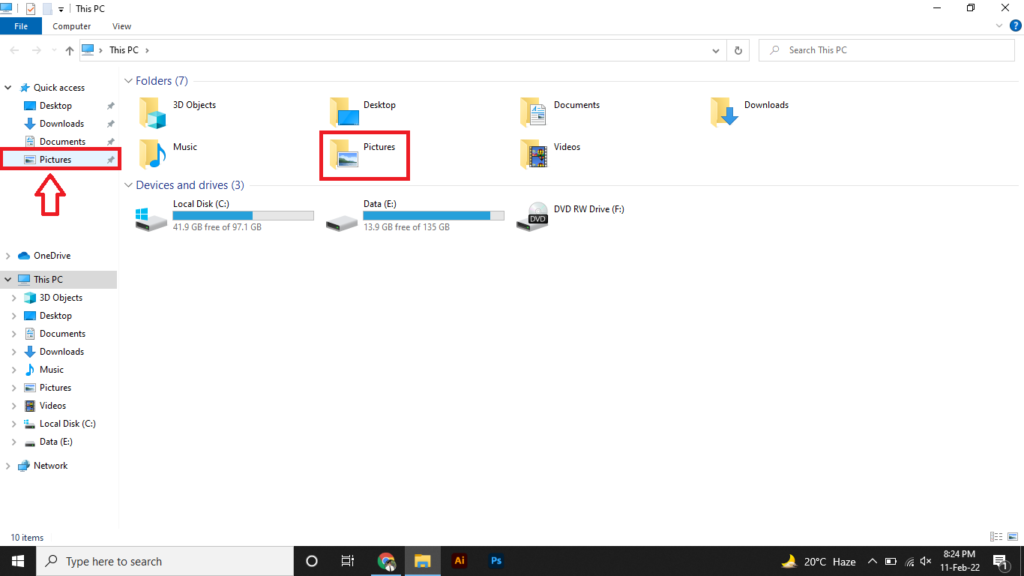
- Now open the Pictures folder and here you can find the “Screenshot” named folder.
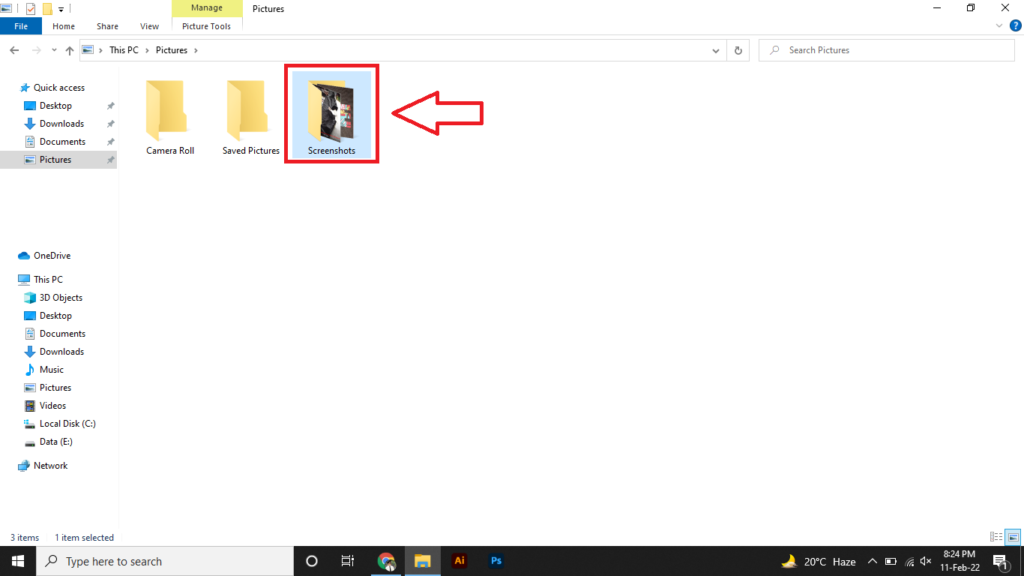
- Open the folder, all your captured screenshots will be there.
Check Also: 15 Best Laptops for Multiple Monitors
2. Save Screenshot After Editing
You can edit your captured screenshots and save them with different sizes and adjustments. Follow these step-by-step guides.
- First, capture the screenshot. To do this press the “Windows button” and “PrintScreen”.
- Now go to the screenshot folder and access your screenshot. Right-click on the screenshot and click “Edit” from the file.
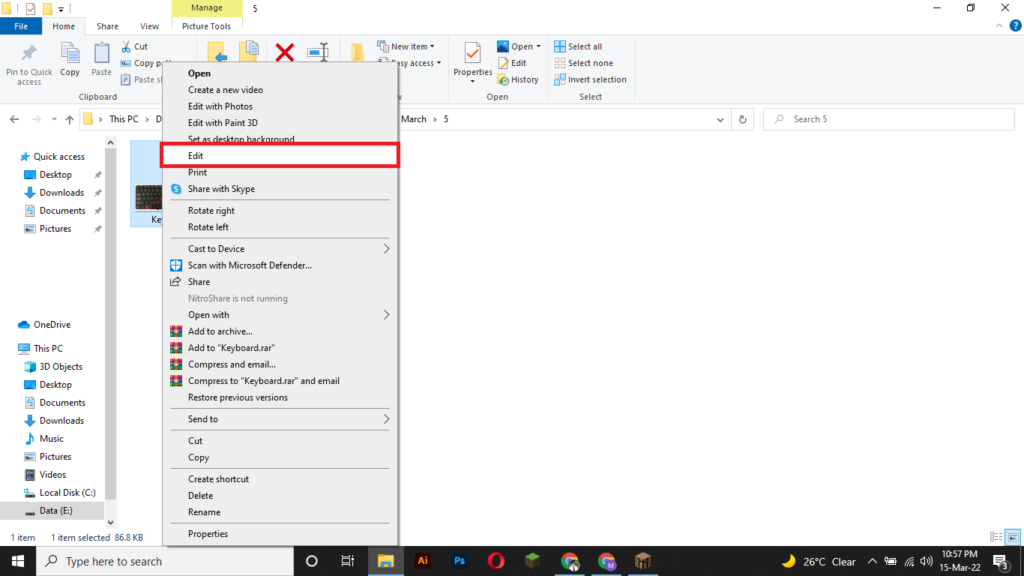
- Now your file will be open into Paint.
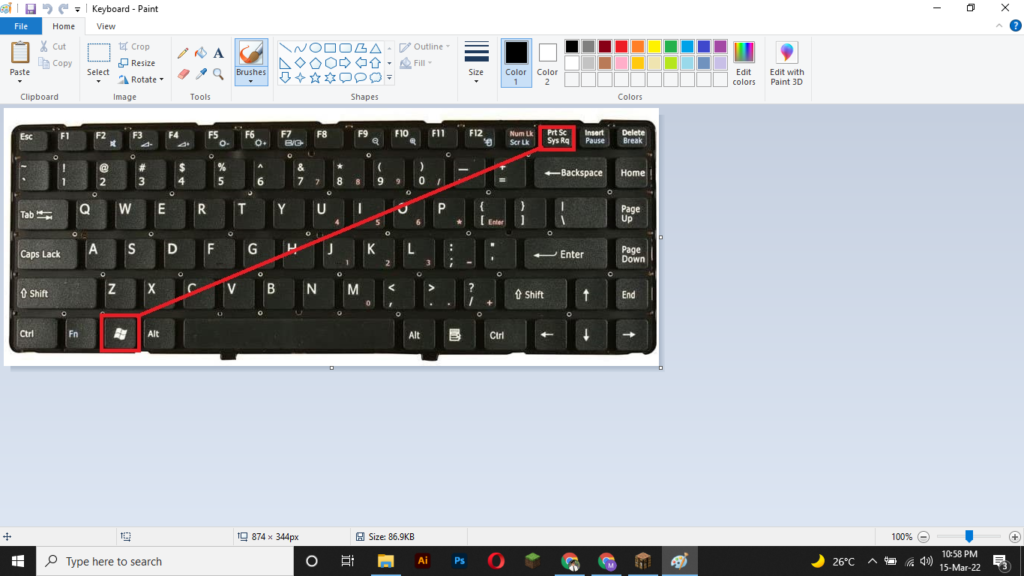
- Here you can resize the image size and do basic editing.
Method 2: Using Windows Pre-Installed tools
There are several pre-installed applications on your Windows. These tools are built to screenshot. These screenshots may include the game screenshots, application screenshots, or any program screenshots.
1. Snip and Sketch Tool
Snip and sketch is the second variant of the snipping tool. You can also access the snip and sketch using the snipping tool. Both have the same functions.
- Go to the Windows search bar and write “Snip and Sketch Tool”.
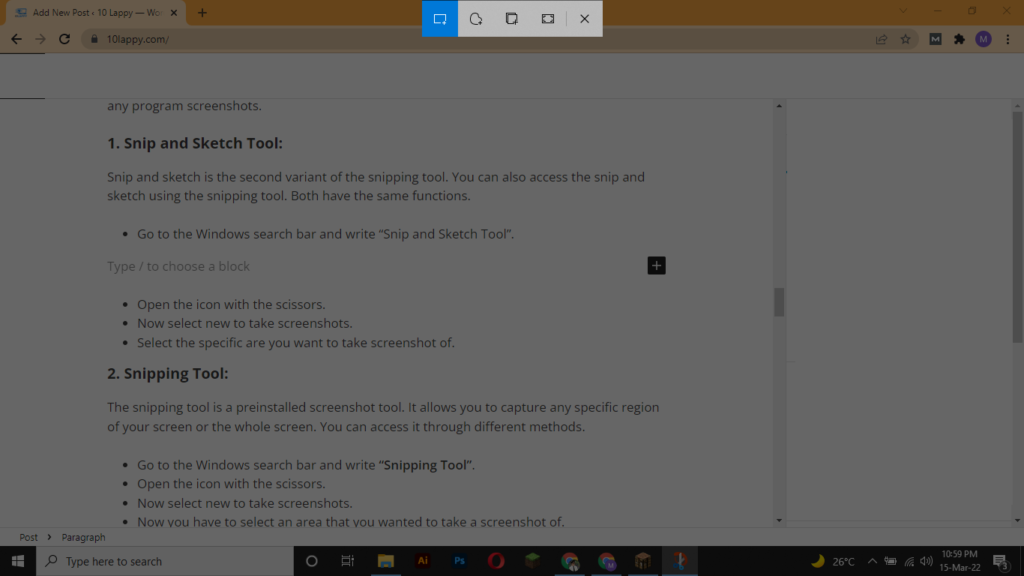
- Open the icon with the scissors.
- Now select new to take screenshots.
- Select the specific are you want to take screenshot of.
2. Snipping Tool
The snipping tool is a preinstalled screenshot tool. It allows you to capture any specific region of your screen or the whole screen. You can access it through different methods.
- Go to the Windows search bar and write “Snipping Tool”.
- Open the icon with the scissors.
- Now select new to take screenshots.
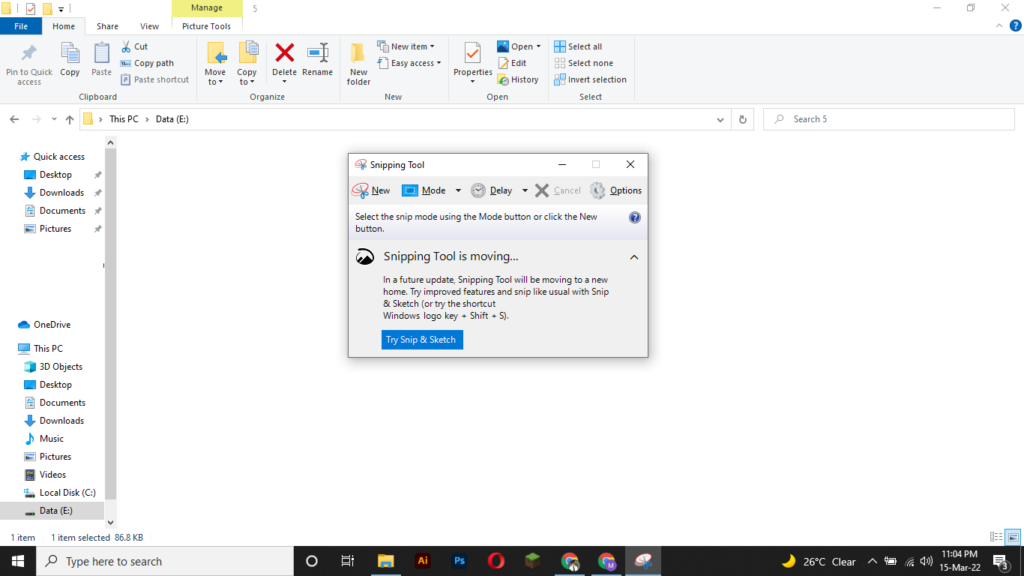
- Now you have to select an area that you wanted to take a screenshot of.
- Release the mouse button, here is your captured screenshot.
- Here you can edit your screenshots too. You can highlight, use a brush or crop your captured image.
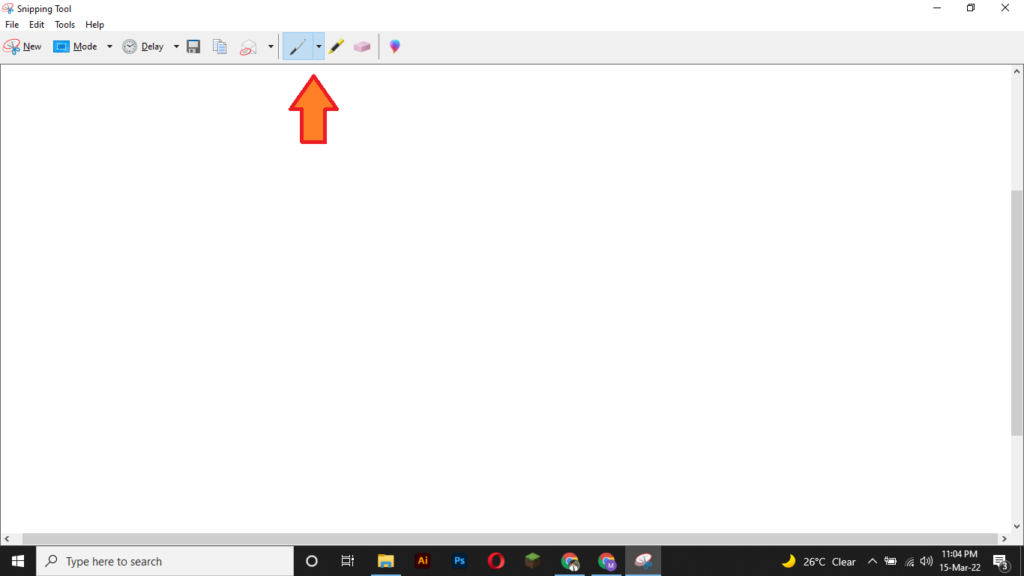
- The shortcut key for the Snipping tool is “Windows key+ Shift + S”.
- After taking the screenshots, press the floppy icon to save them. You can also copy your image to the clipboard by pressing the copy button.
Read Also: How to unlock the keyboard on Acer Laptop?
3. Xbox Game Bar
Xbox Game Bar is a pre-installed application in Windows 10. Xbox Game bar is basically an application to connect your Xbox to a PC or Laptop. It can record your gameplay too. Few simple steps are involved in the methods. Xbox game bar has the ability to take high-quality screenshots.
- Search the Xbox game bar in the windows search bar. Or press “Windows key + G” to open it from the shortcut.
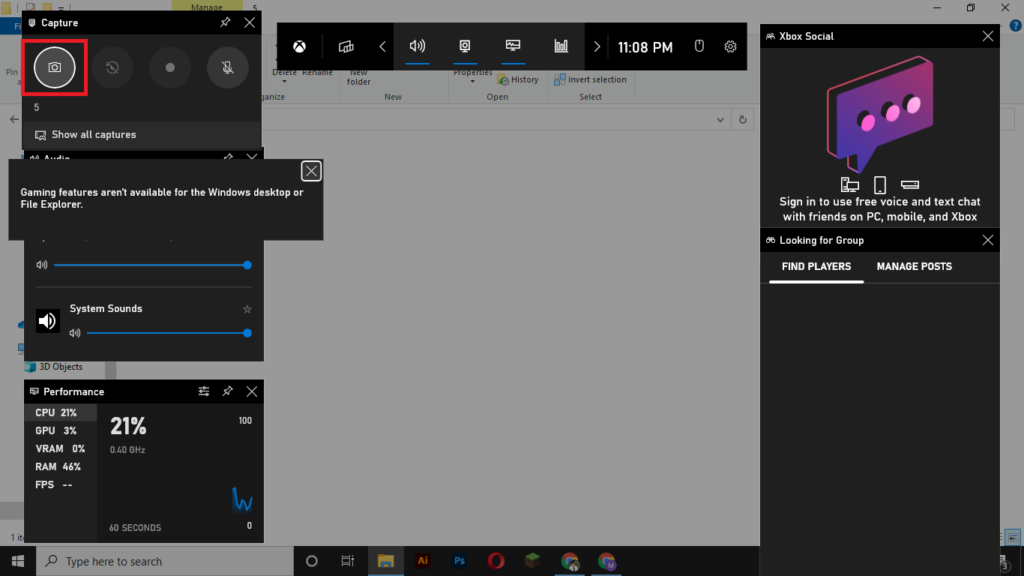
- Now go to the camera icon on the left upper corner of the screen.
- Press the icon to capture the screenshot.
- The shortcut key for the Xbox game bar camera is “Windows Key + Alt +PrintScreen”.
Method 3: Use Print Screen Key With OneDrive
There is an option to capture the screenshot and save them directly to your OneDrive. You do not have to manually search them and upload them. Here is the step-by-step guide to setting up OneDrive.
- Open your OneDrive settings.
- You have to log in to your OneDrive account.
- Now first select the save to OneDrive from the options.
- Now locate the screenshot folder in the OneDrive.
- To capture and save the screenshots, just click the PrintScreen button.
Method 4: Image Shortcut (Paint Method)
There is another shortcut way to capture screenshots on sony’s laptop. This is also called a clipboard or paint method. Here are some simple steps.
- First press “PrintScreen” to capture the screenshot.
- Go to the Windows search bar and type “Paint”.

- Open the application and press “Ctrl+V” to paste the screenshot on the paint clipboard.
- Here you can also edit your screenshot, change colors add arrows, crop, etc.
Read Also: How to find the right charger for my laptop?
Method 5: Screenshot Through Softwares
You can find several applications on the internet that offer screen recording. They also offer a screenshot facility. You can set shortcut keys for many applications too. There is a list of some top screenshot applications below.
1. OBS Studio
- You can Download OBS from the web and install it on your laptop.
- Choose the output folder where you want your screenshot to be saved.
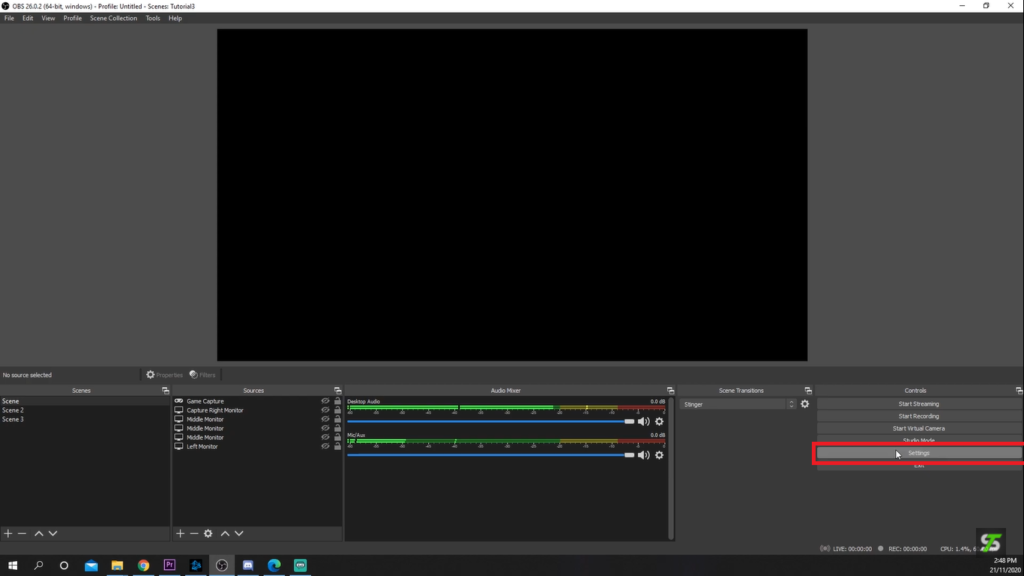
- To view the output, click on it.
- Press save after selecting the output folder.
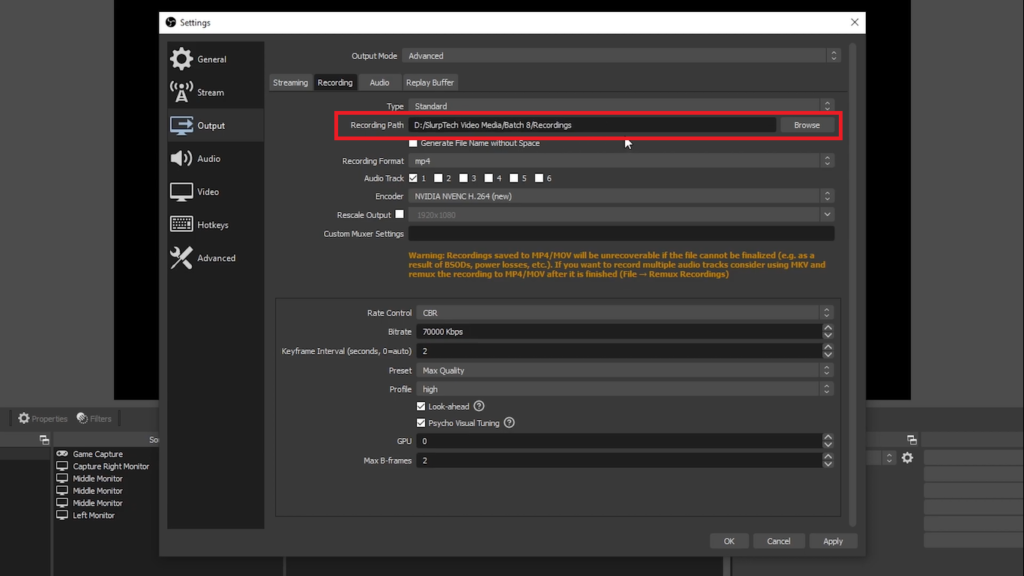
- Open a file by clicking on “Scene” to take a screenshot or you can use the designated key.
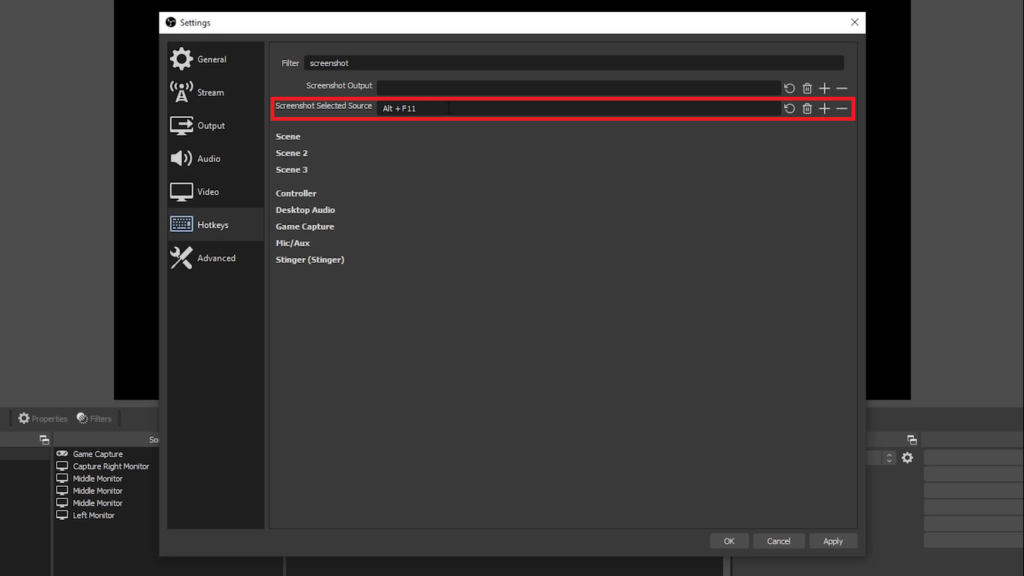
- When you click on “Screenshot scene”, the screenshot will be taken and dropped in the designated folder.
- Additionally, OBS allows you to take screenshots of the source or webcam you are using.
- Open your file in the source panel by right-clicking the source.
- Now press “Capture scene” to take the screenshot and save it.
2. Greenshot – Simple To Capture
Greenshot is one of the best free open-source applications that is used to capture your screen. People most often use it to record live streams or games.
- First of all Greenshot from the given link.
- Install it into the custom location.
- Open the application and select the plugin you want the image in.
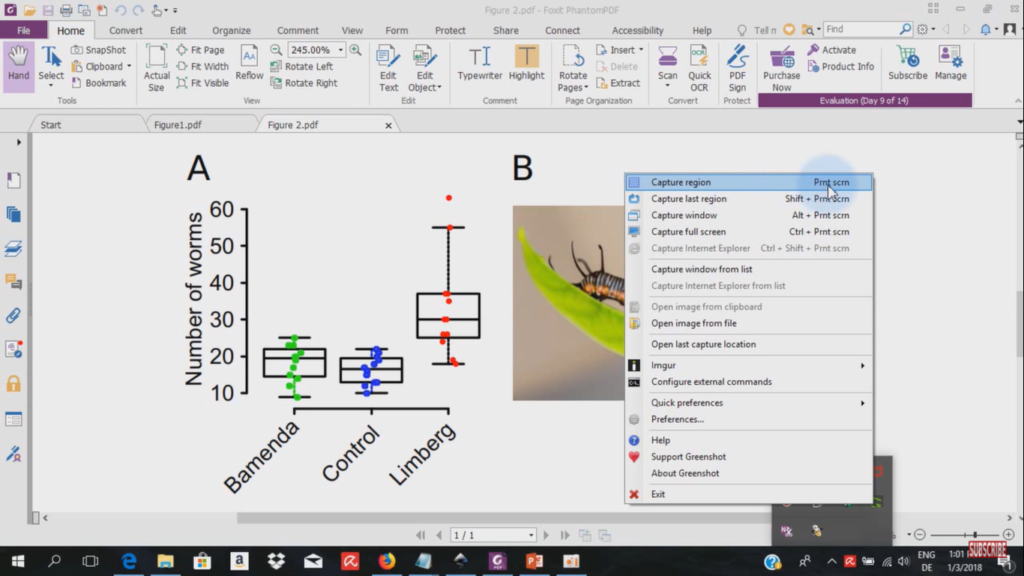
- Greenshot must be enabled for startup on your laptop so that it runs automatically.
- The hotkey for the Greenshot is now your “Printscreen Key”. Just press PrtScr and select the area you want to take a screenshot of.
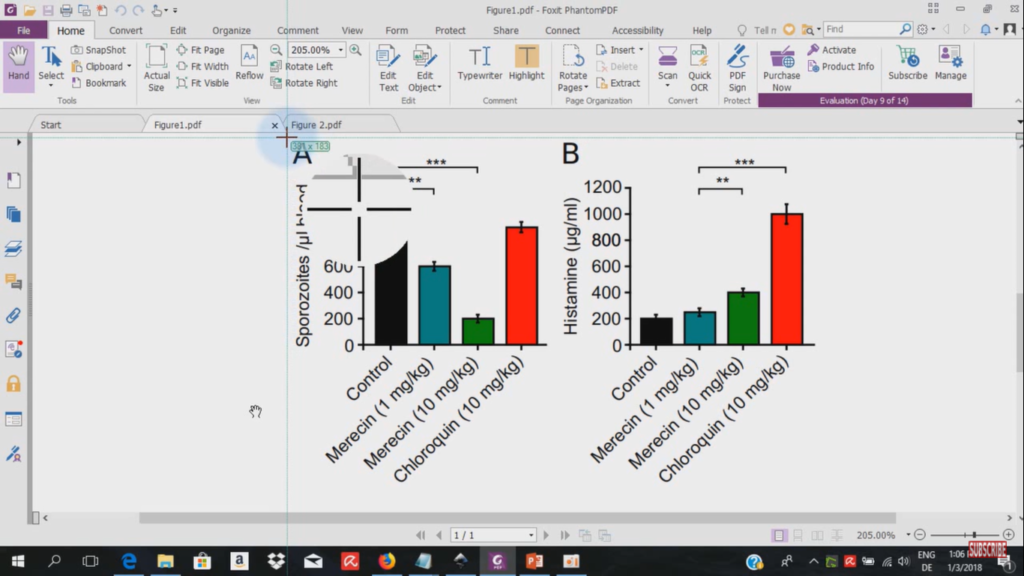
- After the capturing, it will give you a drop-down menu on your screen.
- Now you can select where you want to save the screenshot to or print it.
- It will automatically save screenshots in your laptop’s screenshot folder.
3. LightShot – Fast Screenshots
Lightshot is one of the best applications to take screenshots on the laptop. It is because you can capture specific areas of your screen or program using this application.
- First, download (LightShot) from this link. It is an open-source application.
- After installing on your Sony laptop, run the application as administrator.
- Now add the application to the startup application list.
- Run the application and click the icon on the right lower corner to capture the screenshot. You can also locate a default key to take screenshots.
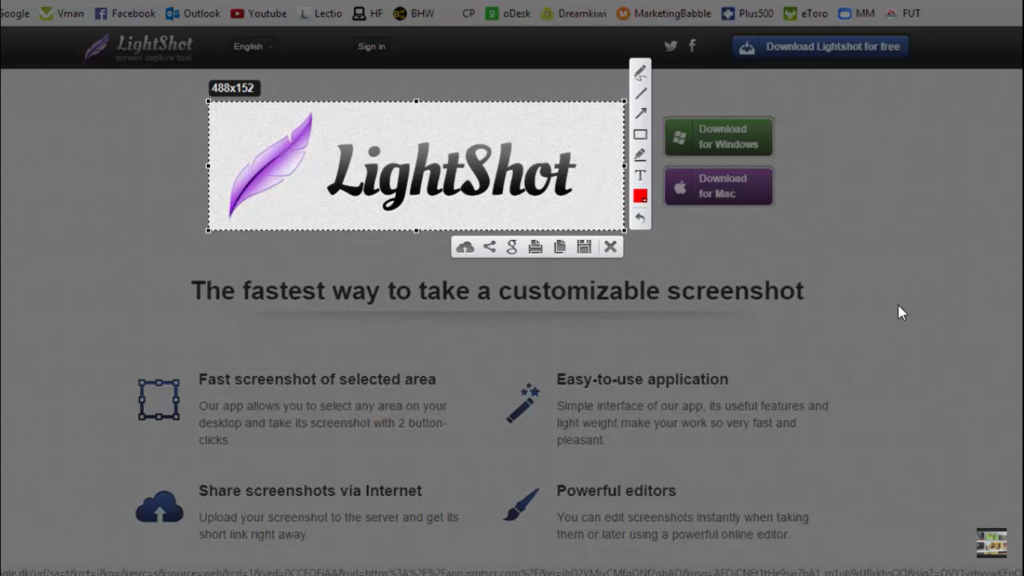
- After clicking you have to select the region or area you want to select as a screenshot.
Read Also: How to screenshot on Gateway Laptop?
4. ShareX – Editable Screenshots
ShareX is another amazing screen capturing application. You can select the specific region of your screen or capture the whole screen. ShareX is a free and open-source application.
- You have to download the (ShareX) from this website.
- Install ShareX on your Sony laptop and run as administrator.
- Include this application in the startup list.
- After opening the application, click the Capture button to take a screenshot.
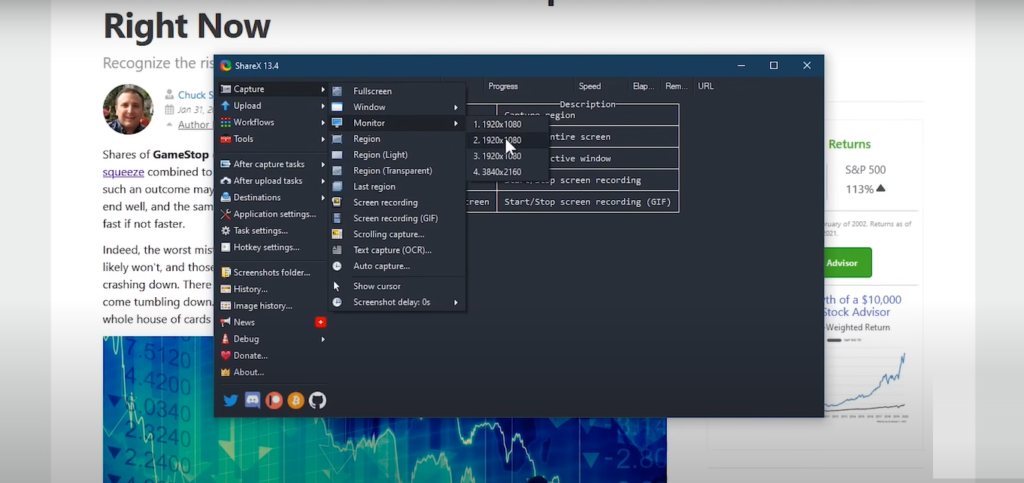
- If you cant to take the screenshot of a specific area you have to select by dragging the mouse cursor over the area.
- You can also do basic editing in ShareX.
FAQs
How do I take a screenshot on a Sony?
There are some simple steps to take screenshots on a sony laptop. You can use the combination keys or specific applications. There are some pre-installed applications in the windows that are just built for screenshot purposes.
Where do Screenshots go in Windows 10?
In Windows 10, screenshots are mostly saved to the screenshot folder. To access the Screenshot folder, go to this PC, then open the Pictures folder. Here you can find the screenshot folder.
Can I take a screenshot of a video?
There are some specific ways to do that. You have to pause the video at the same spot you want to take a screenshot of. Now press Windows logo key + PrintScreen. Your screenshot will be saved to the screenshot folder automatically.
What is the best software to capture screenshots on sony’s laptop?
You can take the screenshot using the PrintScreen key. Press PrintScreen and windows logo button at the same time. Your laptop screen will blink once. It means your screenshot has been taken and saved to the screenshot folder.
Conclusion
There is a complete guide on how you can take screenshots on a sony laptop. There are several methods including the direct keys, pre-installed applications in windows, and some external applications. All are the best methods to capture high-quality screenshots.
