Are you finding a way how to screenshot on Acer laptop? Here are 4 easy and quick ways to take a screenshot on your Acer laptops. There are some direct ways of using combination keys and some are indirect using different applications and software. We will talk about both ways and the importance of each method.
![How to Screenshot on Acer Laptop? [4 Easy Ways]](http://10lappy.com/wp-content/uploads/2022/02/How-To-Screenshot-On-Acer-Laptop-1024x576.jpg)
Method 1: Using PrintScreen Key
1. Saving Direct To Screenshot Folder
- To take a screenshot of any onscreen program press “ Windows key + PrtScr” at the same time in combination.
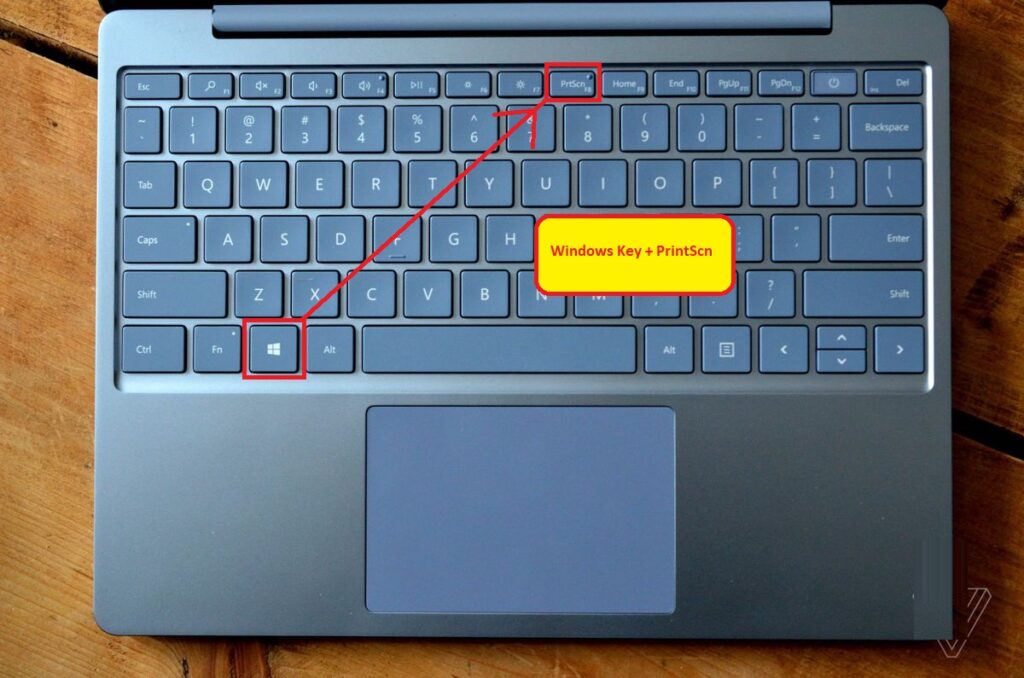
- You have to press the Windows key first and then the Printscreen key to capture the screenshot.
- Your Acer’s laptop screen blinks slightly. It is an indication that your screenshot has been captured.
In most Acer laptops the print screen key works with other combinations like “Alt + PrtScr”. It is also another direct method.
- Open “This PC” on your laptop.
- Go to the pictures folder.
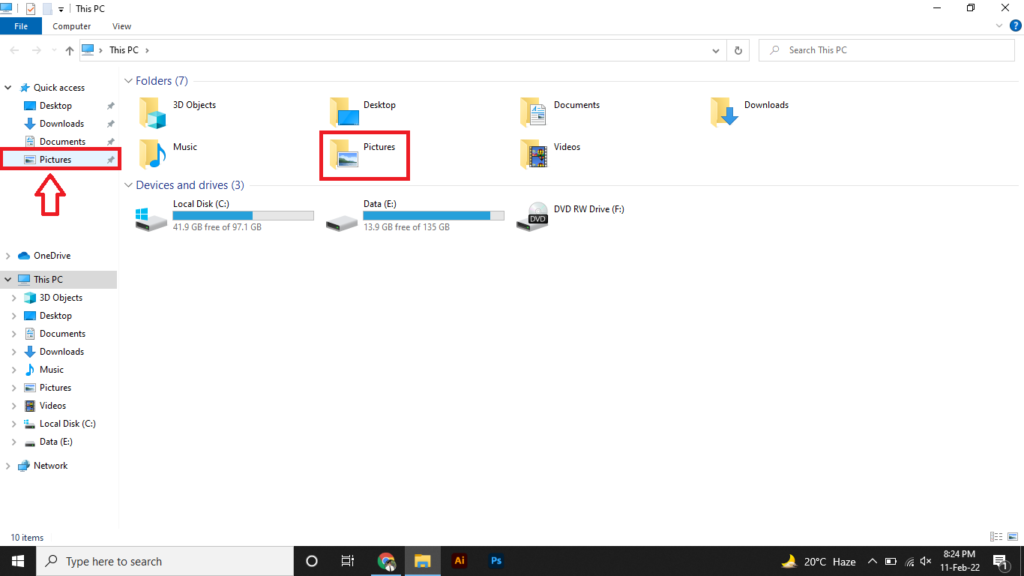
- There will be a folder named “Screenshots”.
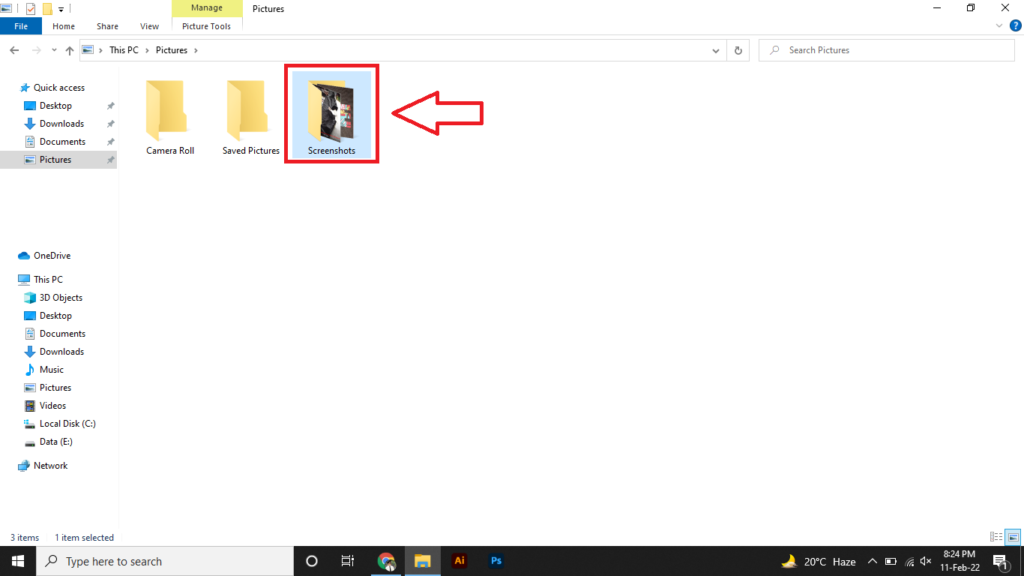
- Open the folder, here are all your captured screenshots of Acer’s laptop.
2. Saving In Paint and Resizing
You can also save your screenshot according to the required size. It involves some simple-to-follow steps.
- Ust press Printscreen or “PrtScr” key on your laptop.
- Now go to the windows search bar and type “Paint”.
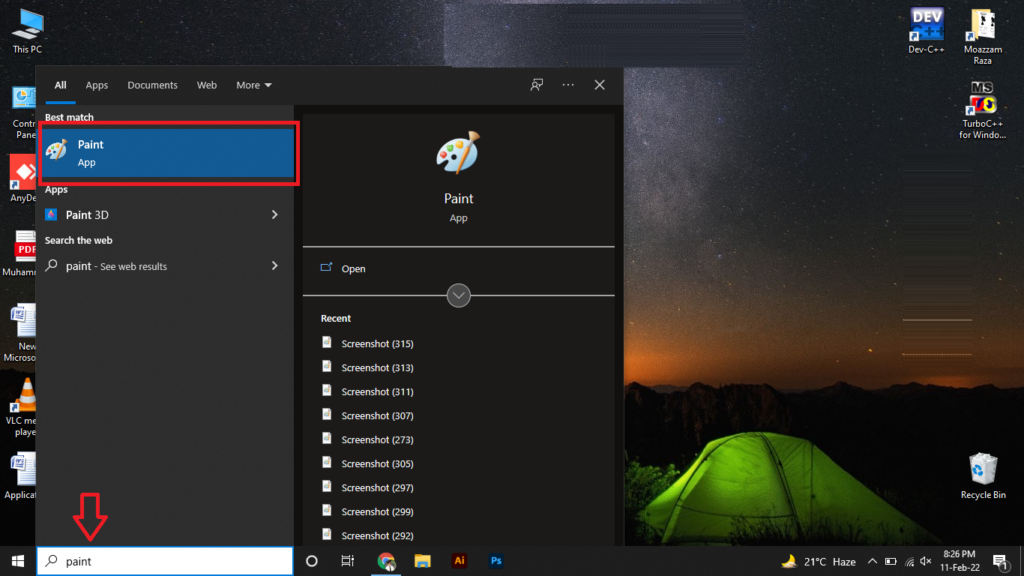
- Open paint application.

- Now simply press the “Ctrl + V” keys to paste the screenshot in the paint.

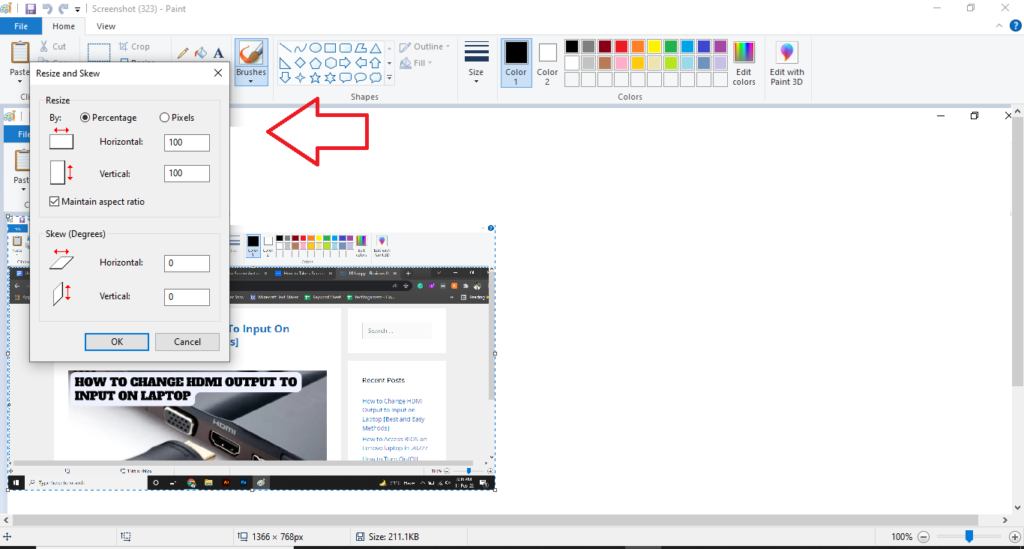
- Now if your want to resize your image, click on resize the image as shown in the picture.
- You have the option to resize according to percentage or Pixels. Add the required pixels or percentage and press ok. It will resize.
Method 2: Using Snipping Tool
The snipping tool is a pre-installed application in Windows 10. It is used to take screenshots of a whole screen or a selected region of the screen. You can easily take a screenshot on your Acer laptops using this application. For Macbooks the application is in “Screenshot”.
- Go to your windows search bar and search “Snipping tool”.
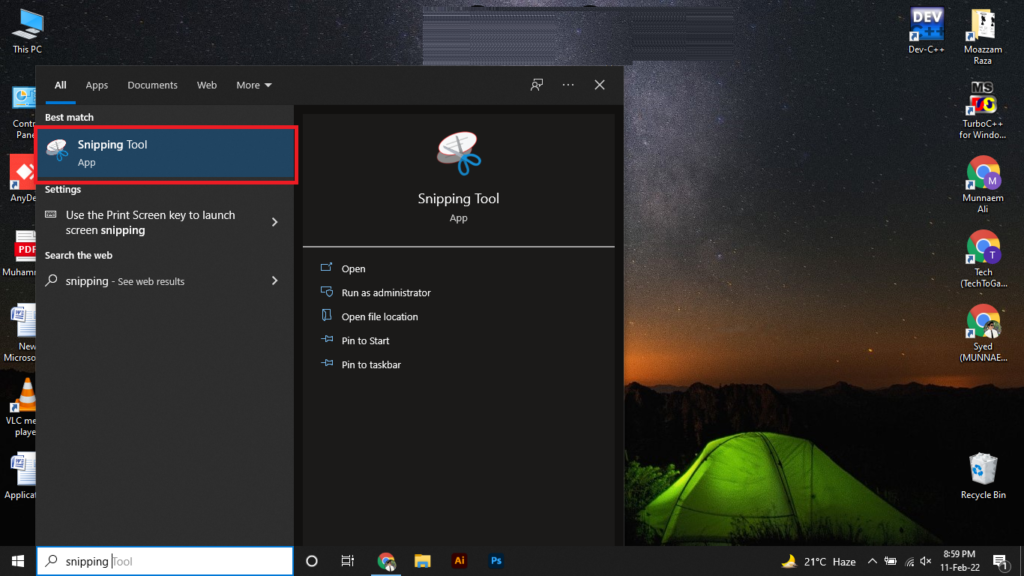
- Click it and open it. After opening the tool it will show different options.
- Simply click on the “New” on the left upper corner.
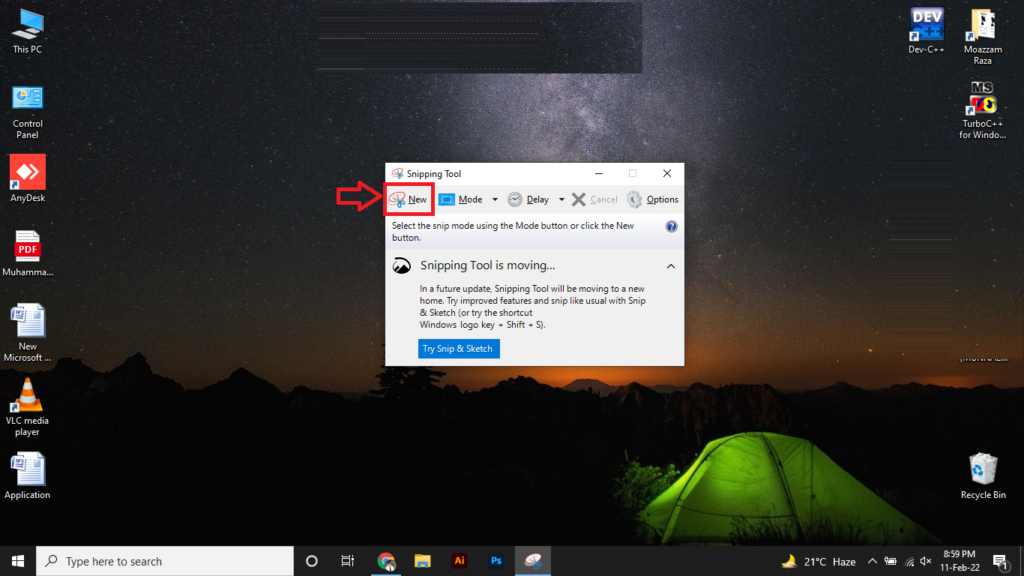
- Your background screen will be blurred.
- Now select the specific area you want the screenshot of by clicking the left mouse key and dragging it over the area.
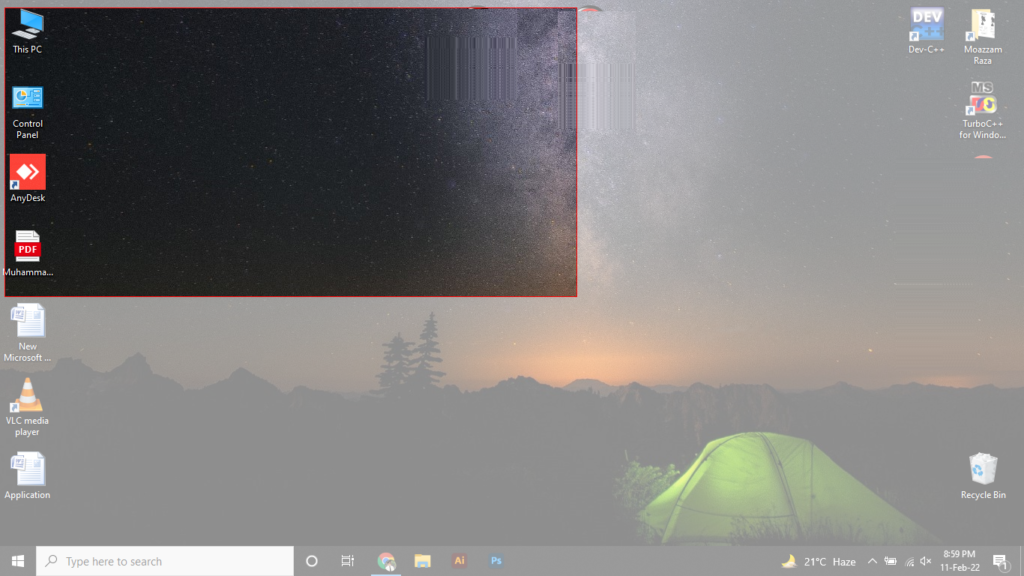
- When you will release the click, it will capture the screenshot of that area.
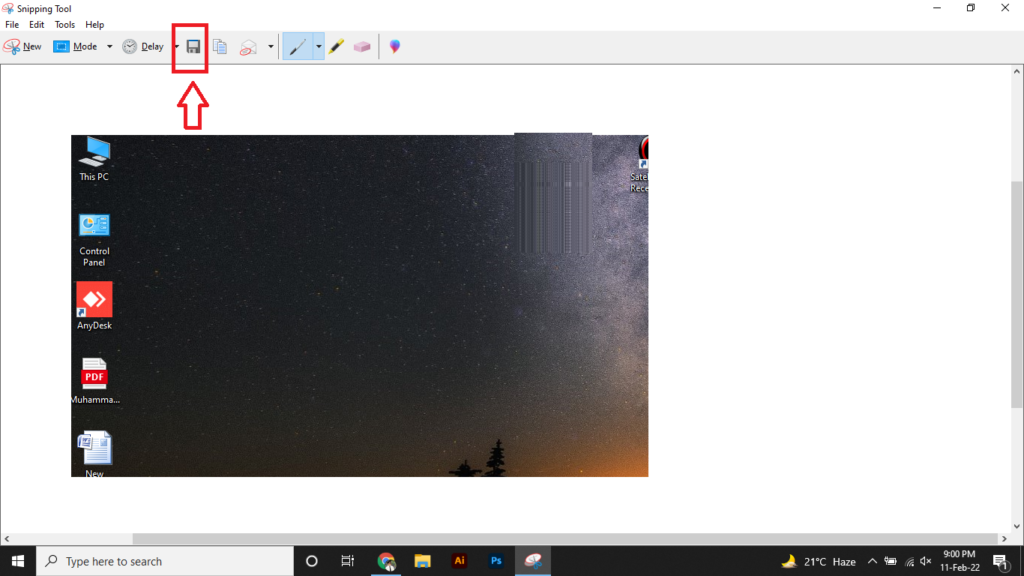
- Now click on “Save” (Floppy icon) to save this image wherever you want.
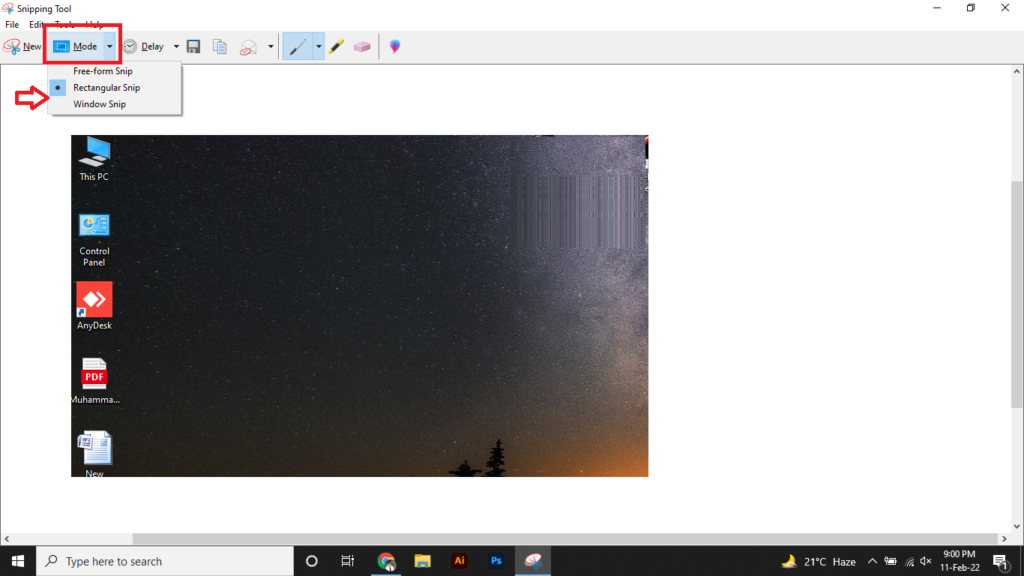
- You can change the angles like width-wise or rectangular area selection too. Just view the “Mode” file.
Method 3: Using Snip and Sketch Tool
Like the snipping tool, there is another tool in windows and most Acer laptops also have it. This is called Snip & Sketch tool. How we can use it to take screenshots? Let me show you.
- Go to the windows search bar and write “Snip & Sketch”. Open the appeared application.
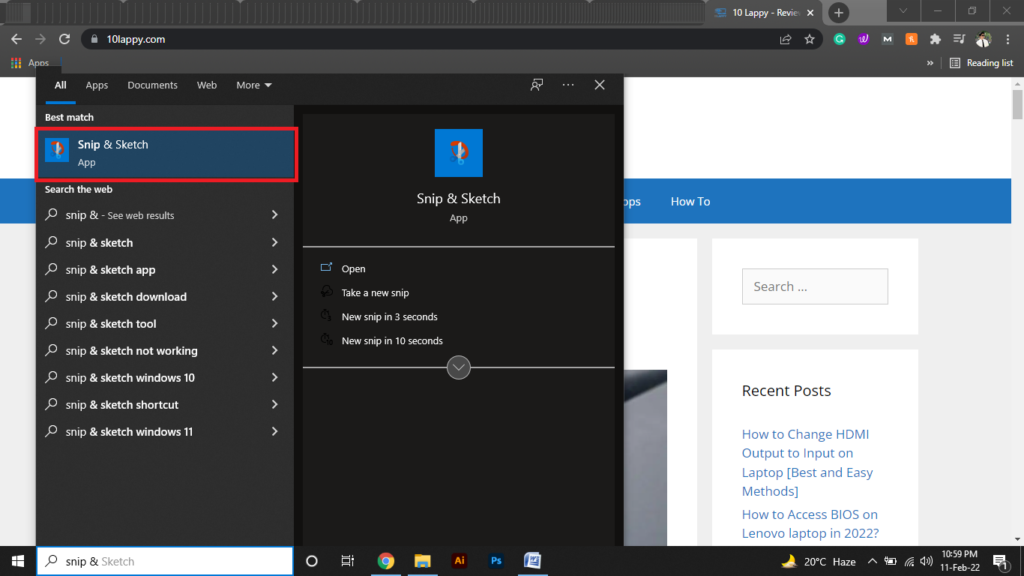
- You can also press “Windows key + Shift + S” to directly open the Snip & Sketch tool.
- Now click on the “New” button.

- Your background screen will appear.
- Select the area you want to take a screenshot of with the help of the mouse cursor.

- After releasing the mouse button, it will capture the screenshot.
- Now you have the option to edit your screenshot.

- You can use a brush on it, a ruler to measure, erase, touch writing, or crop.
Method 4: Using Snagit Application
Snapshots, edits, and light screen recordings are all possible with Snagit. This tool is perfect for providing feedback, creating clear documentation, and explaining exactly how to do things in a simple way.
- Download and Install Snagit on your Acer laptop.
- Open the application once it is installed.
- Now you will see a big red button on the capturing screen. You can read “Print Screen” written just below the button.
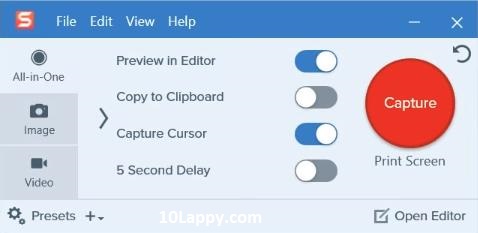
- Click the button. Now select the screen area you want to take the screenshot.
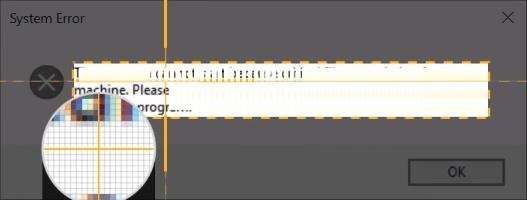
- Once the screenshot is taken, click the camera button to save it.

- You can also edit your screenshots using its editor for general purposes like resizing.
FAQs
How to take screenshots on Acer laptop?
There are different ways that you can take screenshots on Acer laptop. You can press Windows + Printscreen key at the same time to capture the whole screen. This image will be in your pictures then the screenshot folder. Some Acer allows you to capture screenshots using Alt + Printscreen key.
How to take screenshots on Acer in Windows 7 and 10?
In windows 7 and windows 10, you can use the snipping tool to take screenshots. It can capture the whole screen or any selected area of the screen. Save the screenshot as an image on your laptop.
Do all laptops have the same way to capture screenshots?
Most of the laptops have the same ways to take screenshots. You can use the Print Screen key to capture your screen and paste it in paint then save it wherever you want. You can also press the Windows key and Print screen to take and save screenshots in the screenshot folder on your laptop.
Which is the best software to take screenshots in Acer laptop?
The best applications are often installed already with your windows. These applications include snapping tools, snip & sketch. But you can also download and use some other applications like Snagit, Camtasia, and Greenshot.
Which is the fastest way to screenshot on Acer laptop?
Like most laptops, using the PrintScreen method is the fastest method to capture screenshots in Acer laptops. Press print screen key on laptop. Now open Paint and press Ctrl + V in it. Here your image is pasted. Save it in your drive.
Conclusion
Here are the 4 best and easiest way to take screenshots on your Acer laptop. The simplest method is using combination keys like print screen and windows key to capture and save the screenshot within seconds. There are other applications too that have the ability to capture screenshots of specific areas of your screen. You can also use Paint to paste the captured screenshot and resize it according to your need.
